How To Use A Drywall Flatbox To Save Time
Hello all! This article is for anyone looking to use a drywall flat box. It’s not typically a DIY tool – but usually for general contractors or full time drywall finishers. Regardless, I’m going to share with you how to use a drywall flatbox in detail as well as a video at the end of the article!

If this is your first time at Drywall Central, my name is Joe. I’ve been doing it for quite some time now, and not a lot of other drywallers want to share positive and helpful input to others. So I made this entire website to share what I have learned and help others become better at what they do and to help DIYers better understand the drywall trade.
If you haven’t purchased your flatbox yet, there are a lot of different choices on the market. When I asked in a drywall network I’m a part of, a majority actually agreed that a 10” and 12” flat box are the most used. So if you are in the market I would start with one or each of those.
Here are a few I recommend:
As an Amazon Associate I earn from qualifying purchases.
Understand The Components Of A Flatbox
The first thing you want to do is understand the components of a drywall flat box and how it works.
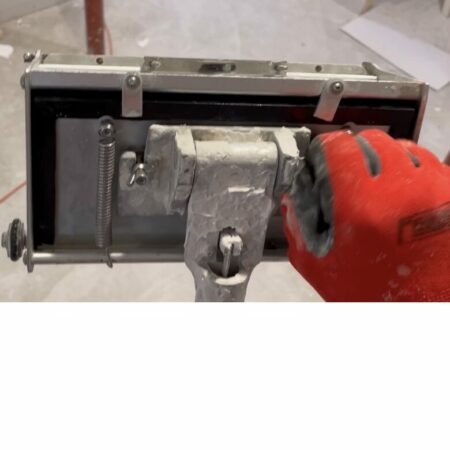
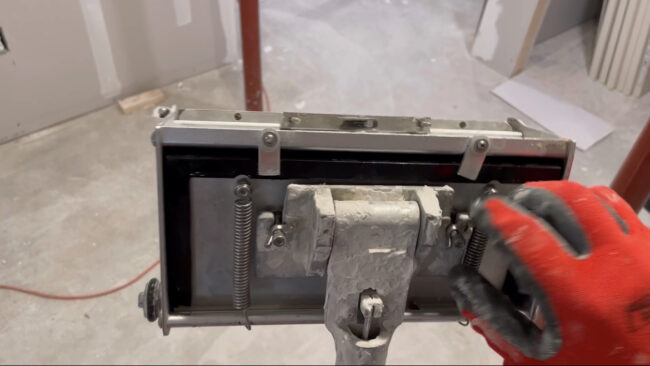
A drywall flatbox’s main components are the actual flatbox and the handle with a brake. When I initially started using a flatbox, for some reason I assumed that the brake handle on the end was to disperse mud from the box – I was completely wrong. Maybe you’re at that moment of defeat too, and it’s now laughable for me. So hang in there, YOU WILL GET THIS.
Now, the main function of the brake is to stop the flatbox from naturally tilting as you move it up and down walls or flatboxing ceilings. The actual flatbox will be filled with mud, so the brakes’ function is to give you control over how the flatbox is angled. Once you have gotten comfortable with this, continue on to the next step.
I Almost Returned My Flatbox Because It Didn’t Work
Since you’re now comfortable and understand the brake and the flatbox and how they are connected, you want to next thin out your mud. Anytime you are using any automatic taping or finishing tool you should 100% be thinning it out. No, you don’t need dawn dish soap or any dish soap for that matter.. you just need water and to mix it very well.
The first time I attempted to use a flat box, I didn’t know to thin the mud. I wasted about an hour of time trying, then switched back to hand finishing. After that defeat, I actually emailed the company to start the return process.
As a very last minute effort to understand the drywall flatbox, I asked former drywall finishers who had experience with them. Of course, they insulted me and laughed, but they actually gave me the answer I was looking for. You need to mix your mud with a little bit of water, or they’re going to be HARD to use.
If you do not have a good mixer yet, I actually use a combo paint and mortar mixer. This way I can mix up an entire 4.5-gallon bucket at once. Some types of mud will need more water, such as all-purpose compound or mid-weight compound. For an actual finishing mud like plus3, you will still need to mix with water but not as much. The consistency of the mud is key to using your drywall flatbox.
Lubricating Your Drywall Flatbox
Once you’ve mixed your joint compound to a good consistency, it’s ALMOST time to load it up. But first, you want to use a lubricant such as WD-40 on the rubber parts of the box. This will help it move smoothly.
Once they are lubricated, there are two small levers on most flat boxes that allow you to open it up. (There are also items called box fillers for this, so you can simply pump your mud into the box without opening it). Holding the flatbox upright, fill the mud into the box. This does take a little time to get right, and it will probably be messy. You want to be able to close the box without mud spitting out of it.
When you have finally closed the box, don’t forget to switch the levers back to prevent it from opening by itself.
Understanding The Physics Of A Drywall Flatbox
Now the motion of using a flatbox is definitely an area that requires practice. The easiest part to learn will be on the center of a wall where you have the factory seam running horizontally across.
Using the flatbox, the only time you will be using the brake will be to align the flat to the wall. After that, it is just a push-and-walk method. The force of you pushing the handle into the flatbox is what causes the mud to push out.
Start at one end of the wall, run it close to the end of the wall, then flip the box over and go the other way (back into the mud you just laid down) then pull away so the two stop points blend in. If you don’t get this right the first time, it’s totally okay. You need to practice to get this right.
If you didn’t like how it turned out, you can always take your 8” or 10” knife (depending on what size flat box you’re using) and skim out what you did. I had to do this quite a bit before I got the hang of using a flatbox.
Video On How To Use A Drywall Flatbox
Two Tips On Maintaining Your Drywall Flatbox
I want to share some tips on best cleaning practices for your flat boxes because I want to save you the frustration I have gone through. (Thank me later)
You should NOT run quickset or easy sand in them!
This should be obvious but you shouldn’t be running these products in your tools. Flat boxes can be a bit pricey and you want to make sure they are well cared for. Cleaning out a flatbox of hardened compound is not fun and will add to your clean up time!
Clean them immediately after you’re done working for the day
Like I mentioned before, any hard mud will be hard to clean. There are a lot of crevices for mud to get into inside the flat box that will affect the next day’s use. Clean it thoroughly using a hose or sink sprayer to get everything out, and WD-40 it when you’re done!
Conclusion
I hope this guide has helped you out with using your flatbox. Once you get this process down, you will very rarely have to finish by hand on large jobs. Drywall flat boxes are a huge timesaver on jobs, if you’re a contractor you will see that the investment is definitely worth it. If you have any questions or if I helped you out feel free to leave a comment below. Best of luck with your project!


