DIY Drywall Installation: A Complete Guide
As a homeowner and a passionate DIY enthusiast, I have always believed in the transformative power of tackling home improvement projects by myself. One of my most memorable experiences was during the renovation of my living room when I decided to install drywall for the first time. With a DIY spirit and minimal prior experience, I faced the daunting task head-on. The initial mess and challenges only fueled my determination, and by the end of the project, I was not only proud of the new walls but also eager to share what I learned. This complete guide aims to equip you with the essential knowledge and skills to install drywall efficiently, ensuring your home looks spectacular without breaking the bank.
Table of Contents
- What is Drywall?
- Benefits of Drywall Installation
- Tools and Materials Needed
- Preparing the Space for Drywall
- DIY Drywall Installation Steps
- Common Mistakes to Avoid
- Expert Tips for Success
- Conclusion and Next Steps
What is Drywall?
Drywall, also known as gypsum board or wallboard, is a construction material made of a thin layer of gypsum sandwiched between two sheets of heavy paper. It serves several purposes in home construction, primarily as a material for walls and ceilings. Each panel is usually 4 feet by 8 feet, making installation relatively simple for DIY enthusiasts.
Benefits of Drywall Installation
- Cost-Effective: Drywall is cheaper compared to other wall materials like plaster.
- Quick Installation: A standard drywall panel can be installed in minutes.
- Fire Resistant: Gypsum is a natural fire retardant, providing safety benefits.
- Soundproofing: It can reduce noise transfer between rooms.
Tools and Materials Needed
Before diving into installation, gather the following tools and materials:
Essential Tools
- Drywall Panels (1/2" is standard)
- Drywall Lift: This tool makes it easier to hold ceiling panels in place (Drywall Lift 11′).
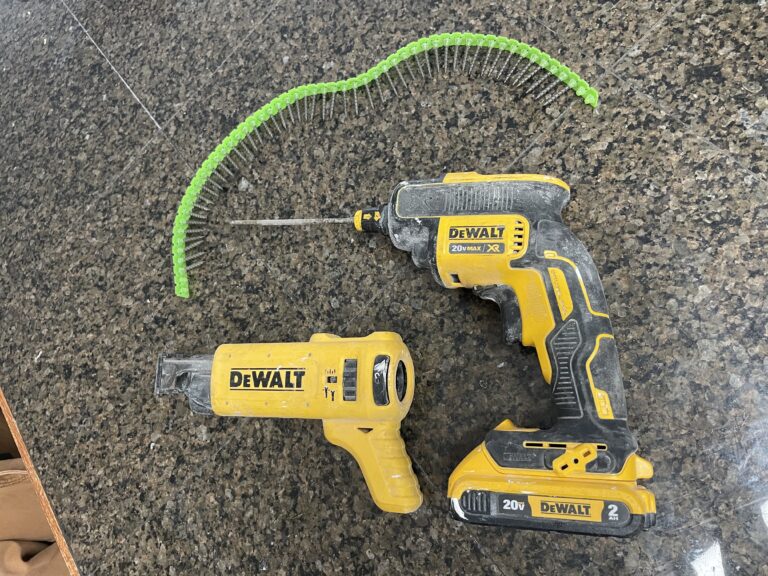
- Screws: Use 1 1/4” screws for walls and 1 5/8” screws if installing on ceilings (1 1/4" screws).
- Drywall Saw: A key tool for cutting drywall panels.
- Taping Knife: Essential for applying joint compound.
- Utility Knife: For scoring panels.
- Sander: Using a WEN Drywall Sander can simplify the finish work.
- Measuring Tape: Accuracy is vital during installation.
- Safety Gear: Goggles and dust mask should not be overlooked.
Materials
- Drywall Panels
- Joint Compound: 3.5 Qt All Purpose Compound is a go-to choice for finishing.
- Mesh Tape: Helps secure seams between panels (Mesh Tape).
Preparing the Space for Drywall
Preparation is crucial for a successful installation. Follow these steps:
- Clear the Area: Remove furniture and other obstacles.
- Inspect for Plumbing and Electrical Wires: Make sure the space is ready by checking that there are no obstructions.
- Measure and Mark: Use a measuring tape to determine where drywall will be installed, marking stud locations on the floor for easy reference.
DIY Drywall Installation Steps
Follow this step-by-step guide for a smooth drywall installation process:
1. Cutting the Drywall
- Measure your wall or ceiling carefully. Mark the dimensions on the drywall panel.
- Using a utility knife, score along your measurements and snap the panel at the line. Clean edges guarantee a better fit.
2. Positioning the Panel
- For walls, start at the top and work your way down. For ceilings, using a drywall lift helps hold panels in place.
3. Securing the Panel
- Use the appropriate screws, positioning them every 16 inches on the studs. Avoid over-tightening, as it can damage the drywall.
4. Taping and Finishing
- Apply mesh tape over the seams where drywall panels meet.
- Use a taping knife to spread the joint compound over the taped seams. Allow drying according to the product instructions.
5. Sanding
- Once the joint compound is dry, sand the surface smooth. A WEN Drywall Sander can make this job easier.
6. Priming and Painting
- Once the surface is smooth, apply a primer followed by your desired paint color.
Common Mistakes to Avoid
- Incorrect Measurements: Double-check measurements to avoid wasted materials.
- Using the Wrong Fasteners: Ensure screws are long enough to hold the panel without protruding.
- Neglecting Safety: Always wear goggles and a mask while sanding or cutting drywall.
Expert Tips for Success
- First Layer of Compound: For a smoother finish, it’s best to apply multiple thin layers of joint compound instead of one thick layer.
- Allow Drying Time: Don’t rush the drying process, as this can lead to cracking.
- Work with a Buddy: Installing drywall can be much easier with an extra set of hands.
Conclusion and Next Steps
Embarking on a DIY drywall installation may feel overwhelming, but with the right tools, materials, and knowledge, it can be a rewarding project. I encourage you to take the plunge and give it a try. Remember to measure twice, cut once, and enjoy the satisfaction that comes from seeing your hard work materialize.
For more detailed instructions, tips on finishing your project, and related resources, check out our articles:
Have you tried installing drywall before? Share your experiences, tips, or questions in the comments below!
Share & Resources
If you found this guide helpful, please share it on Pinterest, Facebook, or Reddit! Your support helps others find useful drywall installation techniques.
Contractors, home improvement bloggers, and DIY forums: Feel free to link back to this article to help your audience with expert drywall installation guidance.
Together, let’s empower our communities with the knowledge to improve our homes, one drywall project at a time!


