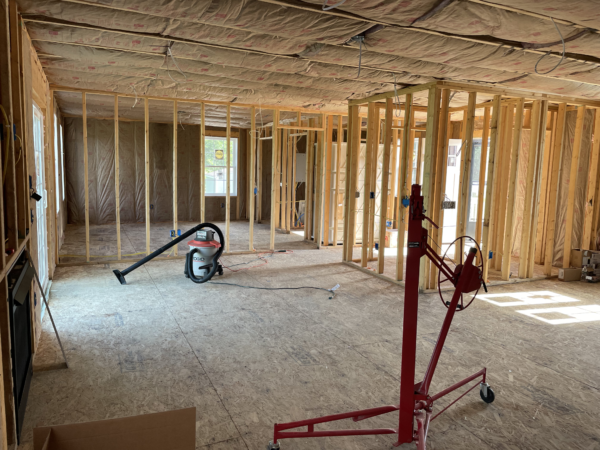
How to Hang Drywall In Simple Steps
If you’re in the process of finishing your home, it’s almost a guarantee that you will be hanging drywall at some point. After all, drywall is such an essential part of any construction project. Drywall is a building material used to seal cracks in walls and ceilings, and it blocks moisture from getting into structures, seals out noise and light, and provides insulation against cold air being blown into the home. However, this same drywall function can also be its biggest challenge when working with it, as many steps are involved in properly hanging it.
That said, if you’ve been wondering how to hang drywall in simple steps, this guide is for you! This article will discuss steps and any tools or contractors needed.
A Step By Step Guide On How-To Hang Drywall: Learn From A Pro
Installing drywall is one of the most common home repairs. This guide will help you save time and money by learning how to hang the drywall. Before proceeding, read the article to avoid unnecessary risks and ensure a safe, hassle-free project.
Planning Is Key
Certainly, you want to get the job done as fast and efficiently as possible, but there’s no need to rush. Invest the time required to plan the entire project and avoid missed steps. If you rush, you’re more likely to skip essential safety precautions and make mistakes.
These conditions will be much more difficult and dangerous to work in. Plan to take on this project during warm months when the weather is less likely to be a factor. Plan the entire project from start to finish. Decide who will be doing the project, whether it’s you or a handyman, and decide on their roles in the process during each step. Write a list of all the tools, materials, and time required to complete the job. This plan will help to minimize mistakes and keep everyone safe.
Prepare the Drywall Sheets
Start by preparing your drywall sheets so they can be installed on your ceiling. Use a utility knife to cut them into appropriate sizes based on where they will be installed in the room. If any pieces are damaged or have holes, replace them with new pieces before hanging them on the ceiling.
Install Drywall on the Ceiling
The next step is to install drywall on your ceiling by using either screws or nails, depending upon whether you have used screws or nails while installing drywall on your walls. The best way to cut these sheets is to use a utility knife and score marks at various points along its length so that it becomes easy for you to break them into equal pieces afterward. After breaking them, screw them up with screws or nail them up with nails depending upon which one you have chosen for fixing them onto your walls.
Measure and Cut Drywall for the Wall
Measure the height of your wall, including ceiling molding and features. Measure the length of the wall and add 2 feet to each measurement. This will give you a rough idea of how much drywall you need. You’ll want to buy more than enough drywall because you’ll use some of it for test cuts and practice.
Install Drywall on the Wall
Attach one end of your first piece of drywall to the ceiling with nails driven through the paper into the studs above. Use a level as you drive nails in each stud along the edge of your first piece of drywall. Continue driving nails until you reach the end of the first piece, then cut it off, so it lies flat against the wall beneath it.
Attach this second piece of drywall by nailing through its paper into adjacent studs. Nail every 12 inches along every stud line inside this second piece, driving nails through its paper into each stud. Use a nail set to pound them down below surface level if necessary. Cut off any excess hanging over edges if needed by measuring between adjacent studs and cutting off excess material here using your utility knife or a drywall saw.
Cut Openings for Doors, Windows, and Outlet Boxes
First, mark the location of any doors and windows on your wallboard sheeting before removing it from its packaging. Use a pencil or marker to create a rectangle around each opening, then cut through the paper with a utility knife or box cutter. You’ll want to do this before you begin hanging because cutting through drywall makes an enormous mess that requires a lot of cleanups!
Secure the Drywall Against the Outside and Inside Corners
Use 1/2” drywall screws to secure the top and bottom edges of each piece of drywall to the studs on both sides. Ensure you don’t drive screws through your electrical wiring or pipes when securing vertical pieces of drywall. To avoid this, lift them as high as possible before driving screws through them.
Add the Finishing Coats of Drywall Compound
Once you have secured the drywall against the outside and inside corners, you can apply the first coat of tape and mud. Apply it in one direction, then use a second coat in another so that each layer overlaps with the previous one by an inch or two at least (this will create a stronger bond between layers). When doing this, keep some extra mud on hand so that you can patch any areas where there are gaps between joints when smoothing out your surface with joint compound or spackle. Apply a thin layer of mud over the entire surface with a trowel, except for around outlets and other items that will be covered later. Let this coat dry overnight before adding another one. Apply two or three coats until you achieve an even finish with no bumps or dips.
Tools Needed To Hang Drywall
There are many tools that you will need to hang the drywall. You may already have some of these tools in your toolbox, but if not, they can be purchased at your local hardware store.
Here is a list of the tools needed to hang drywall:
Hammer
A hammer with a claw end is best for pulling nails from old walls or pulling nails from studs before installing new drywall.
Screw Gun
To install drywall, you do not need a top-of-the-line screw gun. Any regular screw gun will do the trick. If you’re doing a big project, a collated drywall screw gun will help efficiency.
Utility knife
A utility knife is used for scoring and cutting drywall paper, especially when installing corner beads and all around the crown molding.
Measuring tape
A measuring tape is used to measure the wall length to be covered by the project, such as hanging sheetrock on concrete walls or installing a baseboard along an existing wall.
Pencil
Of course, you’ll need a pencil or something to mark out cuts with. Hanging drywall without this will leave you with inaccurate cuts.
T Square, 4 Foot Level, Or Chalk Line
All three of these can be used for accurate drywall cuts. A T square is designed to use one single pencil mark as a guide down a sheet of drywall. A 4-foot level and chalk line will require a mark on the top and bottom of a sheet of drywall before cutting.
Oscillating Multi-Tool
This is not a must-have tool, but it’s one of my go-to’s for making cuts around electrical boxes. The blades on an oscillator tool move back and forth quickly in order to cut drywall (or other material too).
Conclusion
Hanging drywall is a straightforward project if you follow the steps outlined above. Invest the time to plan and measure twice, cut once, and you can avoid any damage to the wall or yourself. Make sure to follow all the safety guidelines, avoid delaying the project, and you’ll be able to complete drywall projects safely and quickly.


