How I Use Automatic Taper in My Drywall Business
When I started my drywall business over 5 years ago, I quickly realized that time efficiency and quality workmanship were the keys to success. Throughout the years, my arsenal of tools has evolved, but one piece of equipment stands out as a game-changer: the automatic taper. In this blog post, I’ll share how I incorporate the automatic taper into my workflow, its benefits, and why it has become an indispensable tool for drywall finishing projects.
My Journey with Drywall and the Discovery of the Automatic Taper
In my early days, I relied heavily on manual methods. I would spend hours applying joint compound and tape, trying to achieve that perfect seam. I remember one project vividly—a large residential job that required taping multiple rooms. It turned into a race against time, and despite my best efforts, I wasn’t completely satisfied with the finish. After that experience, I began exploring how to maximize efficiency without compromising quality.
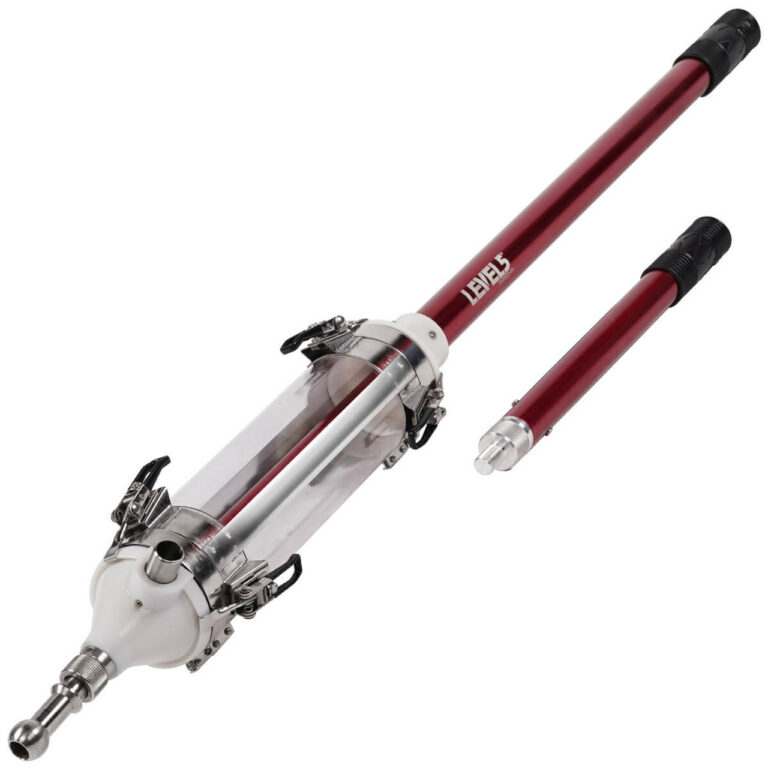
That’s when I first heard about the automatic taper. I was skeptical at first, thinking it was just another tool that promised more than it could deliver. However, after some research and discussions with other contractors, I decided to invest in an automatic taper from Level5 Tools.
Why an Automatic Taper?
Speed and Efficiency
Using an automatic taper can drastically reduce the time spent on tape application. In my experience, it halves the time required to finish a job compared to traditional methods. Instead of manually applying tape, the automatic taper dispenses joint compound and tape in one fluid motion, allowing for quicker completion of drywall joints.
Consistent Quality
One of the standout features of the automatic taper is the consistency it offers. As a contractor, I know the importance of uniformity in finishes. The tapered edges it creates are clean and professional, allowing me to achieve flawless seams that minimize the need for extensive sanding and rework.
Reduced Labor Costs
When using the automatic taper, I can often complete jobs with fewer crew members. This saves not only on labor costs but also allows me to take on more projects. The time I save with the automatic taper can then be reallocated to other essential aspects of my business, which adds to overall profitability.
How I Use the Automatic Taper
Using the automatic taper may seem intimidating at first, but here’s a breakdown of how I incorporate it into my drywall finishing process:
1. Setting Up the Taper
Before starting, I ensure that my workspace is well-prepared. I begin by setting up the automatic taper, filling it with my preferred joint compound (I often use a mix from Level5 Tools) that’s been thinned to the right consistency. A good tip is to use a compound that eliminates air bubbles and promotes smooth application.
2. Preparing the Joints
Prior to taping, I make sure the drywall panels are staggered and properly secured to avoid any movement during the taping process. This step reduces the risk of cracks later on.
3. Applying the Tape
With my automatic taper ready, I position it against the joint at an angle, bracing it correctly with one hand. As I pull the trigger, the taper dispenses joint compound and applies the tape seamlessly. It’s essential to work at a consistent speed, which helps maintain an even coverage.
4. Finishing Edges
Once the tape is applied, I use flat boxes from Level5 Tools to apply a smooth consistent top coat over the tape. This step helps create a smooth surface that drastically cuts down on sanding time.
5. Final Touches
After the initial coats have dried, I check the seams for any imperfections. Typically, the automatic taper does an excellent job, but any small issues can easily be fixed with a joint knife from the Level5 Tools store.
6. Sanding and Finishing
I allow ample drying time before proceeding to sand any areas that require additional smoothing. At this stage, I also use corner rollers for inside angles to ensure there are no rough edges, making the final product seamless.
Tips for Maximizing the Use of an Automatic Taper
If you’re considering adding an automatic taper to your toolkit, here are some tips to maximize its potential:
-
- Practice Makes Perfect: Before using the taper on an actual job, practice on some scraps. Understanding how it handles will give you more confidence.
-
- Keep it Clean: Regular maintenance is crucial. Clean the taper after each use to prevent any build-up of joint compound, which can affect its performance.
-
- Use Quality Materials: Always opt for high-quality joint compounds, as these will give the best finish with your taper.
Trustworthiness and Expertise in Drywall Finishing
It’s important to mention that while an automatic taper can significantly enhance your finishing process, it is only one part of a larger system. Combine the taper with quality tools such as skimming blades and trowels, and you’ll consistently get high-quality results.
Why Choose Level5 Tools?
As a professional contractor, I’ve found that the tools I invest in directly impact the quality of my work. The products from Level5 have proven to be reliable and effective. Check out their extensive range of tools, from mud pans to taping knives, that can help elevate your drywall projects.
Conclusion
Incorporating the automatic taper into my drywall business has revolutionized my workflow. The speed, efficiency, and quality it provides allow me to maintain a competitive edge in the industry. If you’re still applying tape manually, I highly recommend considering an automatic taper. You’ll not only save time but will also enhance the quality of your work.
Have you made the switch to automatic taping tools? Share your thoughts or ask questions in the comments! For more tips on drywall finishing, check out The Best Drywall Taping Techniques or read about How to Repair Drywall Like a Pro.