How I Use Level5 Taping Set in Real Jobs
I used to think any old taping knife would do the trick when working with drywall. After all, how different could they really be? It wasn’t until I had to redo an entire job, fixing my own shoddy work, that I realized the importance of quality tools. If you’ve ever found yourself wrestling with uneven seams, air bubbles, or a drywall finish that looks less than professional, you’re in the right place. This article will guide you through how to properly use the Level5 Taping Set and elevate your drywall game from frustrating to flawless.
Why You Need the Right Taping Tools
The right tools can make or break your drywall finishing project. Poor-quality taping knives might leave you with uneven seams or a finish that looks amateurish at best. If you’ve been struggling with your current tools, consider this: a professional-looking finish isn’t just about technique; it’s about having the right gear.
Common Mistakes to Avoid
- Using Dull Edges: This will lead to uneven results and messy seams.
- Inadequate Joint Compound: Not applying enough compound can result in cracks and a need for additional touch-ups.
- Rushing the Process: Patience is crucial in achieving a high-quality finish.
Why It Matters
Understanding these pitfalls not only saves time and effort but ultimately leads to a more polished final result.
Introducing the Level5 Taping Set
What’s in the Set?
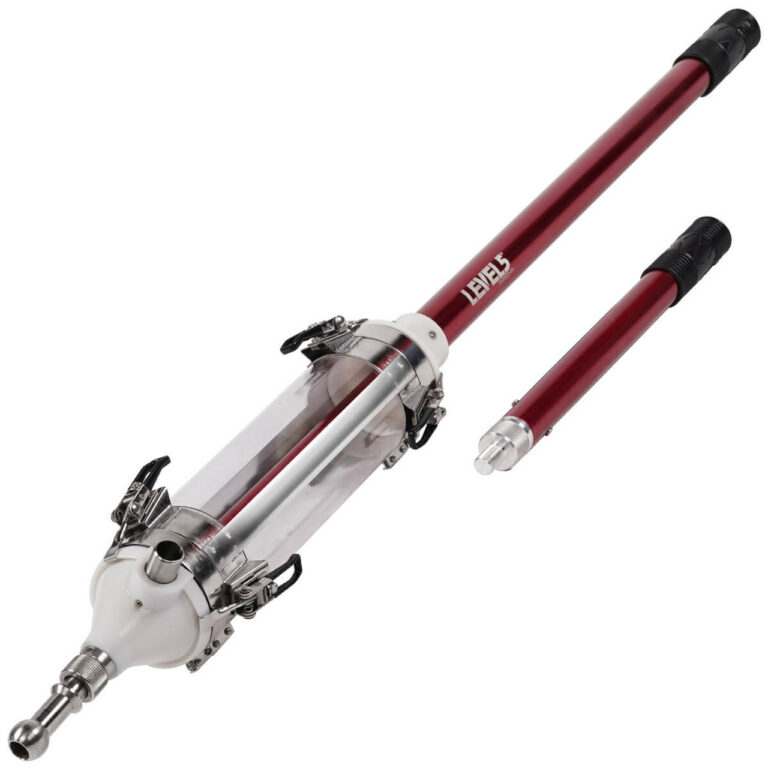
The Level5 Taping Set is a game changer. It includes:
- Retractable Taping Knives: Perfect for precision application.
- Flat Boxes: Ideal for covering wide seams.
- Corner Finishers: For those tricky angles.
This is the skimming blade I trust on high-end finish jobs. When I started using this set, I noticed an immediate difference in my finished projects. The smooth edges and durable materials made all the difference.
👉 Check out the Level5 Skimming Blades here.
Why Choose Level5?
Level5 tools are built for durability and precision, which matters a lot in finishing. The ergonomic handles offer comfort, reducing hand fatigue, especially during long jobs.
Mastering the Technique: Using the Taping Set
Step 1: Prep Your Workspace
Before diving into the actual taping, ensure your workspace is tidy. Dust and debris can compromise your results.
Pro Tip
Keep your joint compound in a bucket with a lid to prevent it from drying out while you’re working.
Step 2: Apply the First Coating of Joint Compound
- Choose Your Knife: Start with a wider knife for the first layer.
- Dip and Load: Get your knife loaded with the compound and start applying it.
- Spread Evenly: Aim for a consistent coating over the seams.
Make sure to feather out the edges to prevent visible lines after drying.
Step 3: Wet Sand for a Smoother Finish
Once the first coat has dried, it’s time to sand. I often use a wet sanding technique with a light touch to smooth out any bumps.
Why It Matters
This minimizes dust and results in a cleaner finish.
Step 4: Second Coating
Apply your second coat using a slightly smaller knife. This will help feather out the edges more effectively.
Step 5: Corner Finishing
For corners, pull out your corner finisher. This tool makes light work of those tricky angles—no more awkward cutting in with a knife.
👉 Want to master corners? Find out how to use a corner finisher here.
Step 6: Final Sanding
Once the second layer is dry, sand lightly, focusing on any visible imperfections.
Maintenance Tips for Longevity
- Clean After Use: Always clean your tools after finishing. Dried joint compound can make them ineffective.
- Store Properly: Store them in a steady environment to keep the edges sharp and functional.
- Inspect Regularly: Check for any wear and tear to know when it’s time to upgrade.
If you’re starting out or want to upgrade your whole setup, this finishing set covers it all. It takes the guesswork out of tool selection, whether you’re a DIY enthusiast or a seasoned contractor.
👉 Explore the complete Level5 finishing set here.
Upgrade Suggestions: Investing Wisely
What’s your next step? If you’re serious about leveling up your drywall game, start with quality tools. The Level5 Taping Set has impressed every pro I know, and it can transform your work too.
Ready to level up your gear? Most pros start with this.
👉 Visit Level5 Tools to start upgrading today.
Conclusion
Using the Level5 Taping Set has truly transformed how I approach drywall finishing. Gone are the days of ragged seams and uneven surfaces. From novice to seasoned contractor, investing in quality tools like these is essential for achieving professional results.
Not sure which tool is best for your project? Here’s what I’d recommend: take the time to invest in a good set of tools and perfect your techniques. Engage with articles covering the best drywall taping techniques to get even more insights.
If this helped, the next thing you should check out is our article on how to repair drywall like a pro.
Every drywall pro I know swears by this setup. You can grab it here and see the difference for yourself!