
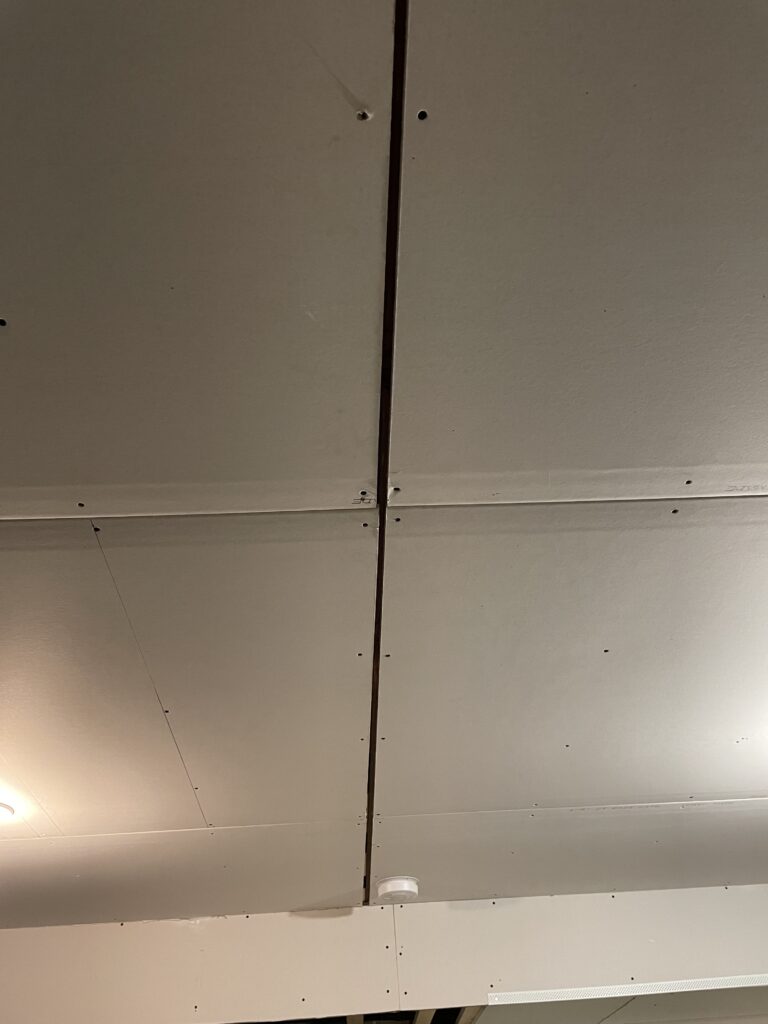
Before you start your DIY drywall project, it’s a good idea to gather as much info as you can to make sure it’s done right. Today’s article goes in-depth from a drywaller’s experience on what to avoid if you hang your own drywall. Keep in mind before you begin that if you stop halfway and hire someone to finish, you will have a much harder time finding a contractor. Most drywall contractors will not finish DIY hung drywall.
Why Won’t Contractors Finish DIY Drywall If I Hang It?
Many drywall contractors will refuse to finish the drywall they were not hired to hang. The reason for this is many who do DIY drywall do not know the proper ways to hang the drywall. Drywall contractors also care about the quality they provide to you. Finishing a DIY drywall job has a chance of diminishing the contractor’s own reputation in the near future.
It can affect their reputation because drywall hung incorrectly creates a few issues. The main concern is sooner-than-expected drywall cracks. Drywall has a particular pattern it should be hung to strengthen your walls and make them last as long as possible. Few drywallers will tape and mud someone else’s work.
I’ve set myself apart from most drywallers and I am one of the few that tape and finish DIY hung drywall. However, I give every customer a disclosure that I cannot provide a guarantee on the work — unless I remove the drywall and start from scratch. No customer wants to do this. It costs more and scratches out the blood, sweat, and tears they’ve already put into it.
So today I want to go over a few common things I run into; mistakes DIY drywallers make.
I’m going to walk you through a particular job I recently did where I finished a DIY drywaller’s job. I took many photos for the sake of writing this article to explain to you the mistakes they made. Not to single this person out or anything – because I see it all the time. Unfortunately, I even see it from some general contractors too!
Top 7 Common DIY Drywall Mistakes
I’m going to walk you through a particular job I recently did where I finished a DIY drywaller’s job. I took many photos for the sake of writing this article to explain to you the mistakes they made. Not to single this person out or anything – because I see it all the time. Unfortunately, I even see it from general contractors too!
#1: Large Gaps Between Drywall Seams
Anytime there is a large gap like this from hanging drywall, it makes the area more prone to cracking in the future.
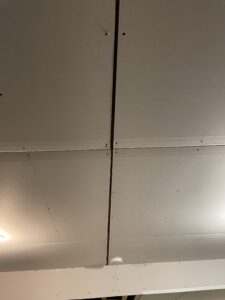
When installing drywall, keep the gaps to a minimum if you can. If you do have areas that have small gaps of less than a half-inch, you will need to pre-fill these areas before taping. Pre-filling is using a hardening compound to fill any gaps before you move on to the next phase of the drywall project.
#2: Not Staggering Drywall Seams
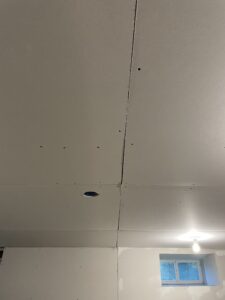
As you can see this drywall has no stagger to it. A stagger is when you begin and end a sheet of drywall differently in each row.
For example, let’s say you have a wall that is 16’ total and are using 8’ boards. It’s easy to jump to the conclusion to run each sideways in a line with the butt end of the boards in the center. But this is actually wrong.
The right way is to use a stagger. If you’re using the same example as above, you will still place the two bottom boards across the middle of the wall. With the butt end of the boards in the center of the wall. Next, rather than running them all together, you will have the center of the bottom seam be the guide for the middle of the board of the top row.
If this is confusing, don’t sweat! I made a video with explanations, and visuals to help you. Check it out! You can also read about it here.
#3: Factory Seams To Butt Seams
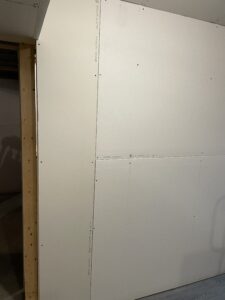
Whenever you purchase a sheet of drywall, you will notice that there is a thinner edge on the long two sides; this is called the factory seams. Factory seams are created to have that bevel area where tape and mud tie a wall together. They are about ¼” thinner than the butt end of drywall.
The butt end of a sheet of drywall is the edge with no recessed joint. It is the area drywall manufacturers cut a sheet of drywall to length. The butt end of the drywall is the true thickness of the sheet (¼”, ½” or ⅝”).
#4: Outlets Over Drywall Seams
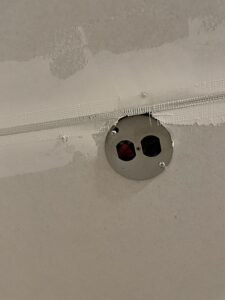
Try to avoid placing outlets where a drywall seam meets. This isn’t necessary, but it will make taping and mudding drywall much easier for you. Before I even begin hanging drywall, I take into consideration where the outlets will land. It is not always avoidable and that’s totally okay.
#5: Not Sinking Screws
When I do DIY drywall finishing for clients, many of them do not sink the screws fully. This means added time to actually finishing the drywall. Drywall screws need to be drilled past the paper face of the drywall.
There are also times when I’ve seen DIY drywallers leave the screw in an attempt to smooth it out with joint compound. This will create an unnecessary and very noticeable hump when the job is done.
#6: Drywall To A Non-Drywall Surface
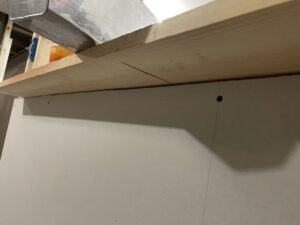
If you have an area that has drywall and it eventually meets brick, shiplap, or anything other than drywall, you should use a tear-away bead. A tear-away bead is also called L-Trim and is made out of vinyl (similar to an outside corner bead).
The tear-away bead is made for transitioning to a non-drywall surface. It is installed on the edge of the two separate surfaces and has a small strip that gets torn off after mudding. It makes the transition much neater-looking!
#7: Installing Corner Bead Too Soon
On jobs where clients try to help make the drywall finishers’ job easier, they usually install the corner bead too soon.
There actually is a certain order to finishing drywall that makes a difference. Here is the order at which drywall should be taped and finished:
1. Butt joints
2. Factory Joints
3. Inside Corners
4. Outside Corners
Finishing drywall in this order ensures that everything is buttoned up and essentially works together for strength.
What Steps Come After Drywall Finishing?
One final thing, if you’re rushing to get everything done with your entire project, it’s important to do things in order.
- Drywall Finishing
- Prime & paint
- Flooring
- Trim
If you want every part of your project to go quickly and easily, work through one process at a time. I’ve been on jobs before where I’ve seen even general contractors begin other projects when the drywall hasn’t been completed.
It would help if you obviously didn’t start priming and painting anything before the drywall is done. For my process, I will sand the drywall under LED lighting and then prime the drywall with one coat of primer. Before priming a second time, I will inspect again with LED lighting and look for areas to touch up.
Flooring should be done after painting. You’ll prevent joint compound, dust, and paint from ruining your new floors.
To finally button things up, all trim should be done last. Floor trim, windows, doors, or any crown molding.
Conclusion
In short, taking on your own drywall hanging might seem cost-effective, but it comes with potential problems. This article highlights that getting drywall installation right isn’t always easy, and DIYers often face issues that affect their walls’ look and strength.
Professionals avoid finishing DIY-hung drywall because of the risk it poses to their reputation. DIYers often make common mistakes like not reducing gaps between seams or placing sheets in the wrong order. These errors can lead to cracks and other problems.
While some exceptions exist, most contractors are wary of completing DIY projects due to uncertainties. Handling gaps, seams, outlets, and screws requires skill. Also, doing tasks in the right order matters, from taping and mudding to painting.
Drywall installation is complex and needs expertise. While DIY can be rewarding, it’s smart to consider potential challenges and think about getting professional help for the best results.

This is actually a very useful post. Because the DIY Drywall in our house last time was not built to a good standard. We did not have much awareness about those things either. But you have explained it in great detail in this post. Now we can make the DIY Drywall right. Thanks so much for posting like this. Keep posting like this.
I appreciate that! I try to make DIY drywall easy to understand so homeowners can save money getting it right!
Drywall is a necessary evil in homebuilding. It’s one of those things that most homeowners do not realize how much of an impact it has on their budget until they’ve been doing it for a while. However, with the knowledge in your article, people will be aware of it and avoid such activities. Thank you very much for sharing this fantastic article.
Thank you! I love breaking it down for DIY Drywallers so they can make their job easier!