Mastering the Art of Drywall Repair: Essential Techniques and Tools for a Flawless Finish
Drywall is an essential component of modern interior construction, providing a smooth finish for walls and ceilings. However, it can easily be damaged, whether through accidental impacts, water exposure, or simply due to age. Knowing how to repair drywall effectively is not only a valuable home improvement skill but can also save you money on professional services. In this post, we will explore essential techniques and tools you need to master drywall repair, ensuring a flawless finish that enhances the beauty of your living spaces.
Understanding Drywall Damage
Before diving into repair techniques, it’s essential to identify the types of damage drywall can suffer. Common issues include:
- Holes: From doorknobs, furniture, or accidents.
- Cracks: Often caused by settling or temperature fluctuations.
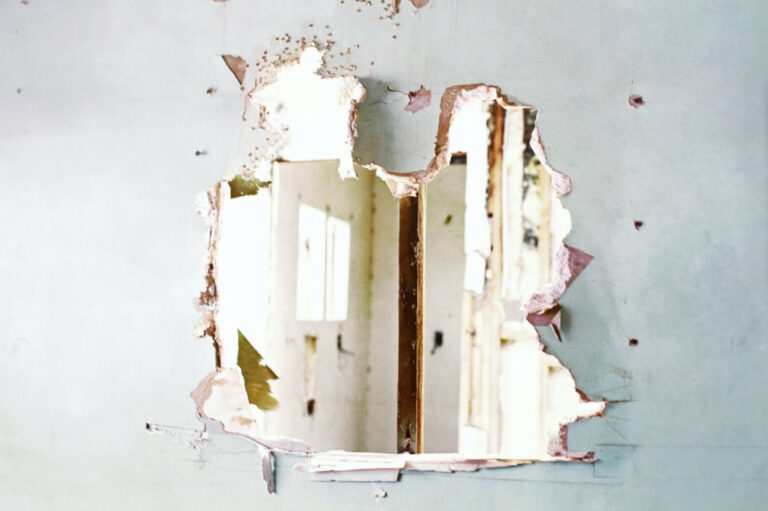
- Water Damage: Stains or swollen areas typically from leaks.
- Dents and Dings: Resulting from impacts and daily wear and tear.
Each type of damage requires a specific repair approach, tools, and techniques for successful restoration.
Essential Tools for Drywall Repair
Having the right tools on hand makes any repair project smoother and more straightforward. Below is a list of essential tools for drywall repair:
-
Drywall Knife: A flexible knife for applying compound and shaping repairs. A 6-inch knife is recommended for most tasks, with larger knives (10-12 inches) for feathering out edges.
-
Sanding Sponge or Sander: For smoothing out repairs before painting. Consider using the detailed WEN Drywall Sander for quicker results.
-
Drywall Tape: Essential for reinforcing seams. You can choose between paper tape (for a smoother finish) and mesh tape (for ease of use).
-
Drywall Compound: You’ll need a good all-purpose joint compound. Consider products like 4.5 Gallon All Purpose Compound or 3.5 Qt All Purpose Compound for small repairs.
-
Utility Knife: Used for cutting drywall sheets or trimming excess tape or compound.
-
Screws and Screwgun: To fasten new drywall or repair existing sections. Keep 1 1/4" screws and 1 5/8" screws handy for different applications.
- Drywall Patch Kits: If you have larger holes, consider purchasing a Drywall Repair Kit for convenience.
Basic Drywall Repair Techniques
1. Repairing Small Holes
Materials Needed: Drywall patch, drywall compound, drywall tape, drywall knife, sanding sponge.
Steps:
- Clean the hole and surrounding area.
- Apply a patch for holes larger than a quarter-inch. For smaller holes, simply fill in with compound.
- If using tape, apply it around the hole prior to filling to provide extra strength.
- Using the drywall knife, apply a generous layer of joint compound over the patch or filled hole, feathering out the edges to blend with the surrounding wall.
- Allow the compound to dry completely before sanding it down to achieve a smooth finish.
2. Repairing Cracks
Materials Needed: Joint tape, compound, drywall knife, sanding sponge.
Steps:
- Widen the crack slightly with a utility knife for better adhesion.
- Clean out any loose debris.
- Apply mesh tape or paper tape over the crack.
- Smooth compound over the tape, feathering out the edges.
- Once dry, sand the area smoothly.
3. Fixing Water Damage
Materials Needed: Mold-resistant drywall, joint tape, compound, primer, paint.
Steps:
- Identify and stop any leaks. Remove any loose or damaged drywall.
- Replace with mold-resistant drywall for areas prone to moisture.
- Use the same techniques as above, using joint tape and compound to create a smooth transition.
- Primer and paint should match the existing wall to complete the repair.
4. Applying Texture
To match textured walls, you can use spray-on texture products or a textured roller. It’s essential to practice on a scrap piece of drywall until you achieve the desired look.
Best Practices for a Flawless Finish
- Feathering: Always feather your compound application to prevent visible lines or bumps.
- Multiple Coats: Apply multiple thin coats of compound rather than one thick coat, allowing each layer to dry completely before applying the next.
- Sanding: Invest in quality sanding tools like the WEN Drywall Sander to ensure a smooth finish.
- Clean Surface: Make sure to remove dust and debris before painting to avoid uneven finishes.
5 Best Drywall Taping Techniques
- Straight Cuts: Use a utility knife for clean cuts on the tape.
- Utilizing Corners: Use corner beads for reinforced seams in corners.
- Consistent Pressure: Apply consistent pressure against tape while applying mud to avoid bubbles.
- Angle the Knife: Make sure your knife is at the right angle when applying compound to avoid pulling up the tape.
- Dry Time: Always let the joint compound dry fully before sanding or applying additional coats.
Conclusion
Mastering drywall repair is a skill that pays off in countless home improvement projects. With the right tools and techniques, you can handle small repairs to major renovations. Remember that patience is key—taking your time to ensure the foundation is clean and properly prepared will lead to a flawless finish you can be proud of.
If you found this guide helpful, share it on Pinterest, Facebook, or Reddit! Your support helps others find useful drywall repair techniques. Contractors, home improvement bloggers, and DIY forums: feel free to link back to this article to help your audience with expert drywall repair tips.
For all your drywall repair needs, don’t forget to pick up these essential products and tools to achieve a professional-looking finish in your own home!