Best Drywall Mud for a Smooth Finish
When it comes to achieving a perfect, smooth finish on drywall projects, the choice of drywall mud is absolutely crucial. Whether you’re a DIY enthusiast or a professional contractor, understanding the benefits and applications of different types of drywall mud will save you time and frustration. This guide will delve deep into the best drywall mud options available on the market, providing you with everything from product recommendations to application techniques.
Understanding Drywall Mud Types
To grasp the differences among drywall muds, it’s essential to know that there are three primary types: All-Purpose Compound, Taping Compound, and Finishing Compound. Each variant serves a different purpose and is suited for specific applications.
All-Purpose Compound
As the name suggests, the All-Purpose Compound is versatile and can be used for both taping and finishing. It’s the go-to product for many DIYers due to its ease of use. This type generally dries quickly and is easy to sand, making it ideal for those looking to achieve a smooth finish without a steep learning curve.
- Best for: Taping, pre-filling, and finishing.
- Recommended Product: 3.5 Qt All Purpose Compound offers excellent workability and a smooth finish.
Taping Compound
The Taping Compound is a more specialized product designed specifically for embedding tape over joints. It has a thicker consistency than all-purpose mud, which helps to fill gaps between drywall sheets more effectively. If you’re working on a project that requires laying down tape, this type of compound is generally considered best.
- Best for: Taping seams where drywall sheets meet.
- Recommended Product: For high-performance options, consider the Plus 3 Compound. You can find it here.
Finishing Compound
For those who are seeking a durable and flawless finish, the Finishing Compound is a must. It is specifically designed for the final coat and is generally lighter and easier to sand than all-purpose or taping compounds. While it can be more challenging to work with, the results pay off in the end.
- Best for: Final finish coat.
- Recommended Use: The finishing compound is best used when you’ve already installed the drywall and taped the seams, providing a smooth finish for paint.
Comparing Top Picks: A Breakdown of Popular Brands
Several brands dominate the market for drywall mud, each offering unique qualities that set them apart. Here’s a comparison of some well-regarded products in the industry.
1. USG Sheetrock
A household name in the drywall world, USG Sheetrock products are known for their reliability and performance. Their All-Purpose Compound is particularly beloved for its smooth application and quick drying time.
2. Plus 3
This product is designed for ease of use, allowing for quicker drying times, making it an excellent choice for those under time constraints. Plus 3 is highly regarded in drywall installation for its lightness and minimal shrinkage.
3. CertainTeed
Many professionals favor CertainTeed products due to their high-quality formulations. The CertainTeed Taping Compound is specially crafted for embedding tape and creates an exceptionally strong bond.
Application Techniques for a Smooth Finish
Achieving a smooth finish is as much about technique as it is about the product. Here are some steps you can follow for a flawless application:
Step 1: Prepare the Surface
Before applying your chosen drywall mud, ensure that the surface is clean and free from dust. Any debris can lead to an uneven finish.
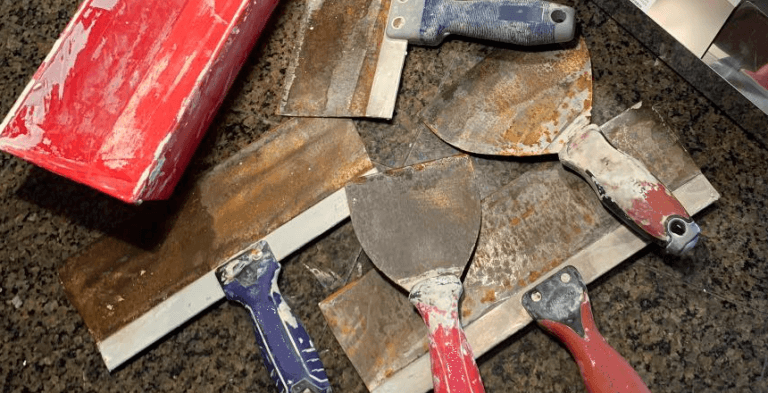
Step 2: Use the Right Tools
Using the right tools is crucial. A drywall knife or a mudding trowel allows for smoother applications. For large areas, consider employing a power sander or, for tough jobs, a WEN Drywall Sander for superior results.
Step 3: Apply the First Coat
Start with a thin layer of your chosen drywall mud to cover all seams and screws. Allow it to dry completely.
Step 4: Sand and Apply Additional Coats
After the first coat dries, sand lightly to smooth out any imperfections. Apply at least one or two more coats as needed, sanding between each layer.
Step 5: Finish with a Final Coat
For the last coat, ensure a thin application for the smoothest finish. Sand lightly once again, and your surface will be ready for priming and painting.
Common Mistakes to Avoid
While applying drywall mud isn’t rocket science, some common pitfalls can hamper your results. Here are a few mistakes to avoid:
-
Overloading your knife: When applying, less is often more. An overloaded knife can lead to thick layers that are difficult to sand.
-
Not allowing sufficient drying time: Rushing through the drying process can result in cracking and finish imperfections.
- Inadequate sanding: Remember that blemishes can often be invisible until paint is applied. Spend time sanding properly.
FAQs about Drywall Mud
Q: How long does it take for drywall mud to dry?
A: Drying times can vary based on the type of compound used and the temperature/humidity in your working environment. Generally, most compounds dry within 24 hours.
Q: Can I use the same mud for taping and finishing?
A: While it’s possible to use all-purpose compound for both, specialized taping and finishing compounds usually yield better results.
Q: What is the best temperature for applying drywall compound?
A: Ideally, apply drywall mud in a climate-controlled space where the temperature is between 50°F and 90°F.
Conclusion: Choosing the Right Drywall Mud
Choosing the correct drywall mud not only influences the quality of your work, but it also affects the time and effort you put into your project. From all-purpose compounds to specialized taping and finishing products, understanding their intended uses will help ensure a smooth, professional-looking finish.
Whichever product you choose, remember to apply with care, sand thoroughly, and take your time in the drying process. If you’re looking for more tips on drywall projects, check out our post on the best drywall taping techniques for further insights.
Share & Resources
If you found this guide helpful, please share it on Pinterest, Facebook, or Reddit! Your support helps others find useful drywall repair techniques.
Contractors, home improvement bloggers, and DIY forums: Feel free to link back to this article to help your audience with expert drywall repair tips.
Together, let’s empower our communities with the knowledge to improve our homes, one drywall project at a time!