Drywall Finishing Tips for a Flawless Look
Drywall finishing can be a daunting task for DIY enthusiasts and professional contractors alike. Achieving that flawless look requires precision, time, and the right techniques. In this comprehensive guide, we’ll explore essential tips for drywall finishing that will leave your walls looking top-notch. Whether you are a novice trying your hand at home improvement or a seasoned tradesperson, this article is packed with insights and techniques to elevate your finishing game.
Understanding Drywall Finishing
What is Drywall Finishing?
Drywall finishing is the process of preparing drywall surfaces for painting or wallpapering. It involves applying joint compounds, sanding, and ultimately achieving a smooth surface. The quality of the finish can dramatically affect the overall aesthetics of a room.
The Importance of Proper Finishing
A well-finished drywall surface not only enhances the visual appeal of your interior but also provides a better base for paint adhesion. A flawed drywall finish can magnify imperfections, which could lead to increased costs for repairs later on.
Essential Tools for Drywall Finishing
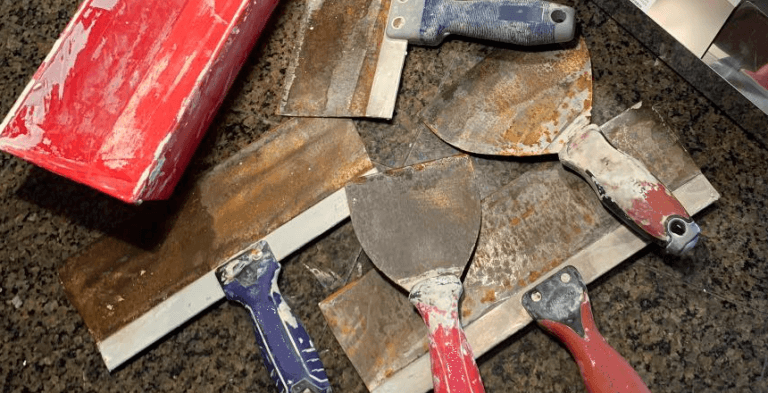
Achieving a flawless drywall finish starts with having the right tools. Here are some essentials:
- Taping Knives: Various sizes are available, but a 12-inch knife is a must for taping seams.
- Drywall Sanders: An electric drywall sander, like the WEN Drywall Sander, can help achieve smooth finishes.
- Joint Compound: Opt for quality options such as 3.5 Qt All Purpose Compound for seamless applications.
- Dust Mask and Protective Gear: Always wear a mask when sanding to avoid inhaling dust.
Related: The Best Drywall Taping Techniques
Step-by-Step Guide for Flawless Drywall Finishing
Step 1: Prepare Your Workspace
Before you start, ensure your workspace is clean and organized. Remove any furniture, lay down drop cloths, and make sure that the drywall is dry and cleaned of any dust and debris.
Step 2: Apply the First Coat of Joint Compound
- Load Your Knife: Scoop a reasonable amount of joint compound onto your taping knife.
- Angle for Application: Hold the knife at a 30-degree angle and start from one end of the seam to the other.
- Apply Even Pressure: Ensure an even layer of compound across the joint. Try to minimize ridges and excess compound, as this will reduce sanding time later.
Step 3: Tape the Seams
Use mesh tape or paper tape embedded in the joint compound. Press the tape firmly into the compound and smooth it out. Ensure there are no wrinkles or bubbles, as these can lead to uneven finishes.
Step 4: Apply Additional Coats
- Second Coat: After the first coat dries (usually 24 hours), apply a second coat of joint compound, feathering it out further than the first coat.
- Third Coat: For the best results, apply a third coat, ensuring an even distribution using consistent pressure.
Step 5: Sanding the Surface
Once the final coat is dry, take your drywall sander and gently sand the area. Here are some tips for effective sanding:
- Use fine-grit sandpaper (120-220 grit) to avoid gouging the surface.
- Sand in a circular motion to blend any rough patches.
- Always wear a dust mask to protect against inhalation of fine dust particles.
Pro Tip: Avoid Over sanding
Over-sanding can result in removing too much material, making it difficult to create a smooth surface. Ensure to feather out your edges and use a light touch.
Common Mistakes to Avoid
- Too Much Compound: Applying excessive amounts of joint compound leads to cracking and excessive sanding.
- Skipping Drying Times: Rushing through the drying phases can result in inadequate bonding.
- Neglecting Proper Ventilation: Drywall dust can be harmful, so ensure good airflow in your workspace.
FAQ about Drywall Finishing
How Many Coats of Compound Should I Use?
Typically, using three coats of joint compound is standard for achieving a professional finish. Each coat helps in blending the seams and achieving a smooth surface.
Can I Paint Over Fresh Joint Compound?
It’s best to wait until the joint compound is fully cured and sanded smooth before applying paint. This could take anywhere from a few hours to several days, depending on your climate and the thickness of the compound.
What is the Best Type of Joint Compound for Beginners?
For novices, a pre-mixed all-purpose compound like 3.5 Qt Plus 3 Compound is ideal. It’s easy to work with and provides a smooth finish.
Related: How to Repair Drywall Like a Pro
Expert Insights into Drywall Finishing
According to industry professionals, taking the time to perfect your finishing technique pays off in the long run. Many experts recommend investing in quality tools, which can make a significant difference in the ease of application and the final appearance.
Adding a drywall lift, like the Drywall Lift 11′, can assist in overhead installations and help achieve that flawless finish faster.
Conclusion
Achieving a flawless look in drywall finishing doesn’t have to be an overwhelming task. With the right tools, techniques, and a bit of practice, you can transform your walls into smooth canvases ready for paint. Whether you are an eager DIYer or a professional contractor, implementing these drywall finishing tips will help you achieve impressive results.
Share & Resources
If you found this guide helpful, please share it on Pinterest, Facebook, or Reddit! Your support helps others find useful drywall finishing techniques.
Contractors, home improvement bloggers, and DIY forums: Feel free to link back to this article to help your audience with expert drywall finishing tips.
Together, let’s empower our communities with the knowledge to improve our homes, one drywall project at a time!