How to Drywall a Bathroom
When it comes to renovating or building a bathroom, one of the essential steps is drywall installation. The bathroom environment requires careful consideration and proper techniques to ensure a durable and water-resistant result. In this comprehensive guide, I will walk you through the entire process of drywalling a bathroom, covering everything from preparation and material selection to hanging, taping, mudding, finishing, and the final touches. By following these steps and best practices, you’ll achieve a seamless and professional-looking drywall installation that stands up to the challenges of a bathroom’s unique environment.
Step 1: Bathroom Drywall Preparation and Materials
Before you start hanging drywall in your bathroom, it’s important to take the necessary preparatory steps to ensure a smooth process and excellent results:
Inspect the framing
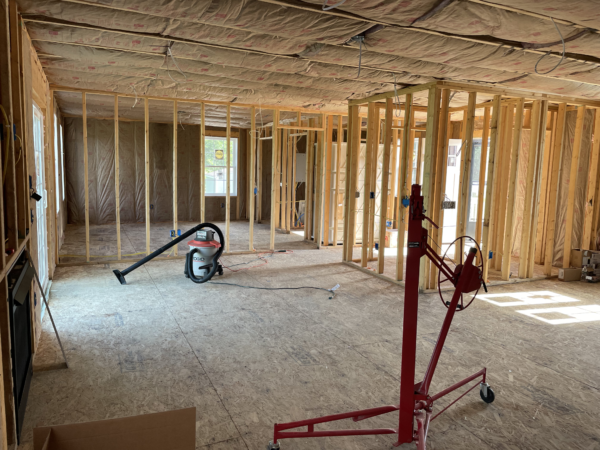
Check the bathroom’s framing, ensuring that it’s stable and free from any damage or rot. Repair any issues before proceeding. If you’re performing a remodel, make sure every previous nail/screw is removed from every stud. If you cannot remove a rusted nail, hammer them in to ensure the new drywall will fit flush to the studs.
Tools and Materials
Collect all the tools and materials you’ll need for the installation. Most bathrooms are similar in size, a standard bathroom is approximately 40 square feet.
Moisture Resistant Drywall: Always use moisture resistant drywall in high moisture areas, especially a bathroom. If you are unsure of how much drywall you will need, visit my drywall calculator.
Drywall Screws: The amount of drywall screws you need will depend on how much drywall you need for the project. As a general estimate, take the number of drywall sheets you’re purchasing, and multiply by 32. Example: 10 sheets of 4×8 drywall multiplied by 32 = 320 drywall screws. If you’re using the standard moisture resistant 1/2″ drywall mentioned above, you’ll want to use 1-1/4 in. drywall screws. Note: A 1 llb pack of 1-1/4 in. drywall screws comes with 238 drywall screws.
A Utility Knife (AKA Sheetrock knife): This will be used for cutting the drywall.
Drywall T Square: A Drywall T square is made to easily rest on a sheet of drywall in order to get straight cuts.
Joint Compound: For this project I recommend two main products. All Purpose Joint Compound and Plus 3 Joint Compound. If you have a standard sized bathroom of around 40 sq ft, this will have you covered and you’ll have some extra.
Joint Tape: Joint tape is an essential component for creating strong and seamless joints between drywall sheets. It reinforces the joints and prevents cracks from forming over time. There are various types; paper, mesh, and fibafuse. Paper is the strongest and cheapest option.
Taping Tools: For finishing the drywall in a bathroom, I recommend using a 4″, 10″, and 12″ taping knife. This is the minimum you’ll need to get it done.
Sanding Blocks: After applying joint compound, you’ll need sanding blocks to smooth out the surface of the compound and achieve a smooth finish. Use a 180 grit or higher for sanding drywall.
Plan the Layout
Measure the bathroom’s dimensions and plan the layout to minimize the number of seams and cuts. Consider starting with full sheets on the most visible walls. If it’s your first time ever hanging drywall, I created a guide and video that will help you with this step.
Step 2: Taping and Mudding Joints
Taping and mudding joints is the step where most people give up on DIY drywalling (just being honest!). But I want you to hang in there, because even if you do not have experience doing this – I know anyone can do it.
Have patience and resilience in this step!
How To Apply Joint Tape
Place joint tape over seams, corners, and joints, using joint compound to secure it in place.
This is the “easy sounding” version of drywall taping. But I’m going to give you more details I’ve picked up on personally that will help you be successful.
When you first load your joint compound into your mud pan, add a little bit of water to it and mix it before you begin. This will make the joint compound much easier to work with. Any time I see a DIY Drywall project a customer has hired me to repair, I can tell they skipped this step with how rough the compound looks.
Use a 4″ knife to apply the thinned compound to the joint first. Next you will apply joint tape over the seam, trying to align the center of the tape to the center of the drywall seam. Once you have the tape applied, cut it on the end of the seam. You will now do what is referred to as “bedding” or “embedding” the tape into the seam. Using the 4″ knife still, push into the tape and move along the entire joint. Remove any excess compound that comes from behind the tape if you applied too much.
Apply drywall joint tape to the bathroom in this order:
Butt Joints > Factory Joints > Inside Corners
Outside Corners will be the last part you do (if you have outside corners), but this will require a separate material.
For Outside Corners, read: How To Drywall Corner Bead
Coating Drywall with Joint Compound
Your first coat of joint compound should be applied once the tape has dried overnight. This will ensure a solid bond between the two joints, tape, and joint compound.
Instead of using a 4″ taping knife in the previous step, the next coat we will be using a 10″ taping knife. We use this size to help fill in the factory-made recess in the drywall. Continue using your all-purpose joint compound for this step. We will move on to Plus3 in the final step.
When using a 10″ taping knife to coat over the tape coat, align the mud so it sits in the center of the knife. The process I use for this is: scoop from the pan, swipe left side of the knife back into the pan, swipe right side of the knife back into the pan. It aligns the mud right into the center of the knife.
Also, don’t overthink this. I’m providing as much detail to help you understand the process until you feel comfortable with what works for you.
Now that you have the joint compound on the 10″ taping knife, you’ll begin filling in over the tape. You will have to scoop from your pan many times; especially for factory joints due to their recess. I typically lay out all of the mud on one entire joint first, and then do my smoothing later. Think of it like spreading mayo or peanut butter on a sandwich. Put it all on sloppy, make it look nicer after.
To make your joint compound appear more flat on the wall, you’ll utilize a method known as ‘feathering’. Feathering joint compound means; slightly bend your 10″ knife into the wall on each side of the joint, then do one final flat swipe down the center (without bending this time).
Final Coat of Joint Compound
The second coat of joint compound is the very same thing as the first, except you will be switching two things:
1. Instead of a 10″ knife, your last coat should be done with a 12″.
2. Instead of all-purpose joint compound, you should switch to Plus 3 compound.
Why Use Plus 3 Joint Compound On The Last Coat?
You should use Plus 3 joint compound because it is designed as a finishing mud. The main benefit I prefer in using Plus 3 is that it is much easier to sand than All-Purpose Joint Compound. I have tried both ways, and I can vouch for it’s ease of sanding. After I switched, I never went back to using all purpose joint compound for all coats.
Step 3: Sanding the Drywall
The final step in finishing your bathroom drywall project will be sanding. There are two different methods you can use for this:
Using A Drywall Sanding Sponge
A drywall sanding sponge will be the cheapest way to sand drywall. For your average size bathroom, you should only need 1 or 2 sanding sponges to complete the sanding. It will be rough on your shoulders, but luckily you can have this done within a day.
Using A Drywall Sander
Incorporating a drywall sander into your drywall finishing will cut the amount of time sanding in half. If you have the resources to grab one, I highly reccomend it. I’ve been using the WEN Dustless Drywall Sander and I’m not only happy with how efficient it’s made me, but I’m happy it hooks right up to my shop vac so I don’t have to deal with as much dust.
My Drywall Sanding Method
In my day to day drywall jobs, I will always utilize both a drywall sanding sponge and the WEN Drywall Sander. I first begin with the inside corners and work my way around the room with an LED light. I move the LED light at different angles in order to gauge how smooth the corner is while I sand. Don’t be suprised when you see multiple ridges and grooves along your joint compound.
Someday you may hear a story about a drywall finisher who “never had to sand because he was that good”; but he was also a liar.
Once my corners are complete, the rest of the sanding is done with my dustless sander. I still use the LED light at different angles along the wall.
Final Thoughts
The journey of drywalling a bathroom is a dynamic process that blends technical skill with creative expression. From the initial stages of preparation and material selection to the intricate taping, mudding, and sanding, this comprehensive guide has equipped you with the tools and insights to achieve a flawless and durable drywall installation. Remember that every step contributes to the overall outcome, combining functionality and aesthetics in a unique way.

Message From The Author
As you embark on your bathroom drywalling project, I encourage you to embrace the learning process. Challenges are opportunities for growth, and each effort you invest will be rewarded with a space that stands as a testament to your craftsmanship. If you encounter questions or uncertainties along the way, I’m here to help.
Leave a comment below with your questions, and I’ll be more than happy to provide guidance and solutions. Your questions not only enrich your own understanding but also contribute to the collective knowledge of our DIY community. Together, we can enhance the effectiveness and clarity of this guide, ensuring that everyone can confidently tackle their bathroom drywalling project with remarkable results.

