How to Drywall Mud: Hand Finishing vs Automatic Drywall Tools
Every customer I meet HATES drywall mudding, so today I’m diving into how to drywall mud like a pro! Drywall mud, also known as joint compound, is a crucial element in any drywall installation. It’s used to cover up seams and imperfections, as well as to provide a smooth finish for paint or wallpaper. If you’re a DIY enthusiast or a professional contractor, knowing how to apply drywall mud like a pro can save you time and money, as well as give you a sense of pride in your work.

In this guide, I’ll cover everything you need to know about drywall mud, including the different types, tools and materials, and step-by-step instructions for applying it like a pro.
Types of Drywall Mud
Before we dive into the application process, first I want to discuss that not all drywall mud is created equally. Many professional drywall finishers know this, but some general contractors and DIYers do not. It’s important that you know what you should use depending on the project.
Here are the top types of drywall mud & joint compound:
All-Purpose Drywall Mud
As the name suggests, all-purpose drywall mud is a versatile option that can be used for a variety of applications, including taping, bedding, and finishing. It’s a good choice for beginners or DIYers, as it’s easy to work with and dries relatively quickly. However, just because the name states “all purpose” there are times where you shouldn’t use this.
When should you use All Purpose Drywall Mud?
All purpose drywall mud is used by drywall finishers for the taping process. Though the name suggests “all purpose”, there are different products out there meant to make your drywall project less of a headache.
Lightweight Drywall Mud
Lightweight drywall mud is mainly used for finishing drywall. At the final steps of a drywall project, drywall finishers will switch to a lightweight drywall mud for easier and smoother finishing.
Quick-Setting Drywall Mud
As the name suggests, quick-setting drywall mud sets faster than regular drywall mud, which can be helpful when you need to complete a project quickly. However, it’s important to note that it can be more difficult to work with and may not provide as smooth of a finish as all-purpose or lightweight mud.
When should you use Quick-Setting Drywall Mud?
Quick Setting Drywall Mud should be used for:
- Quick Drywall Repairs
- Filling in holes
- “Pre-Filling” drywall gaps (before applying drywall tape)
Knowing the difference of the types of drywall mud is CRUCIAL not only to your success drywall mudding, but to the longevity of the end product!
Understanding the Different Types of Drywall Tools
In addition to drywall mud, there are a few other tools and materials you’ll need to have on hand in order to apply it.
There are many drywall taping tools in todays market, but I’m going to simplify them with simple categories so you can better understand them.
- Hand Finishing Tools
- Semi Automatic Taping Tools
- Automatic Taping Tools
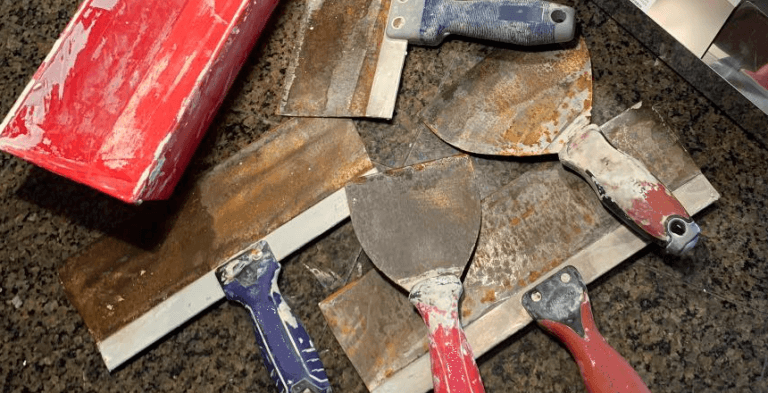
What Are Drywall Hand Tools?
Drywall hand tools are for hand finishers. Through the entire step of the process, it is 100% done with hand tools.
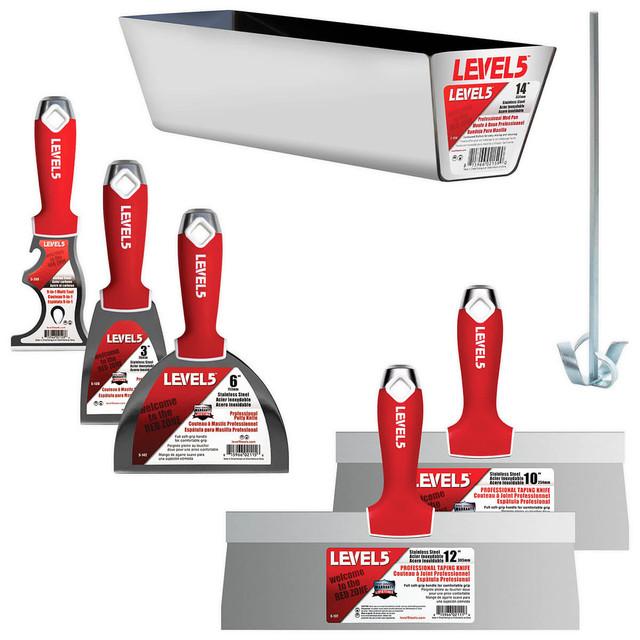
The primary drywall tools of hand finishers are:
- 4″ taping knife
- 5″ taping knife
- 10″ finishing knife
- 12″ finishing knife
What Are Semi-Automatic Drywall Tools?
Semi-Automatic tools are meant to be a middle of the line between hand finishing and fully automatic drywall tools. These type of drywall finishing tools are for finishers by preference, or affordability. They can decrease the time of finishing by hand by nearly 50%. With that being said, they are usually a bit more expensive than hand finishing tools.
The three most widely used semi-automatic taping tools are:
#1. Drywall Banjo
A drywall banjo helps speed up the taping process by applying the mud to the tape automatically as the tape is rolled.
Simply thin your joint compound, put some into the banjo, and start running tape along drywall seams!
#2. Semi-Automatic Taper AKA “Slop Bucket Method”
This tool is designed to enhance the speed of the taping process. Once you’ve fed the tape through the semi-automatic taper, you connect it to a 5-gallon bucket containing thinned taping mud.
When you pull the tape, the tool evenly distributes a consistent layer of mud onto one side of the tape. (I pull my tape into a spare bucket, attached to my belt. Hands free!)
The tool features an adjustable wing nut that allows you to fine-tune the amount of mud to be applied according to your preferences.
It’s also worth noting there is a cheaper alternative to this semi-automatic taper, which is the TapeBuddy Drywall Tape Dispenser. I consider it a hybrid of the banjo and the semi-automatic taper. It’s best if you’re on a budget!
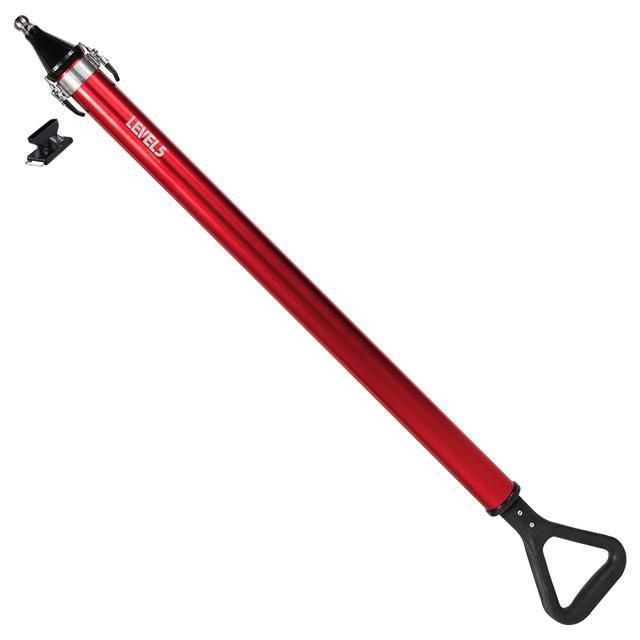
#3 Drywall Compound Tube
A drywall compound tube is best compared to a water cannon for play time in swimming pools, except not for water!
A compound tube has a plunger inside which allows the finisher to “suck” up thinned joint compound. The mud is then pushed out by compressing (think like an accordion) the tube and the handle.
These require applicators with them, which are snap-on tips that disperse the joint compound. They are mostly used for inside and outside corners.
What Are Automatic Drywall Tools?
Automatic drywall tools are specialized equipment designed to streamline and accelerate tasks involved in drywall installation, taping, and finishing. These tools are often used by professionals in the construction and drywall industries to improve efficiency and achieve high-quality results. Here are the most well known automatic drywall tools:
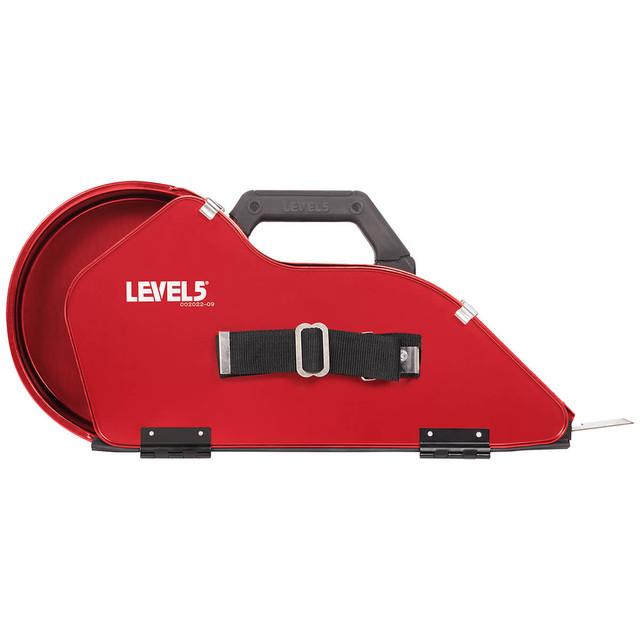
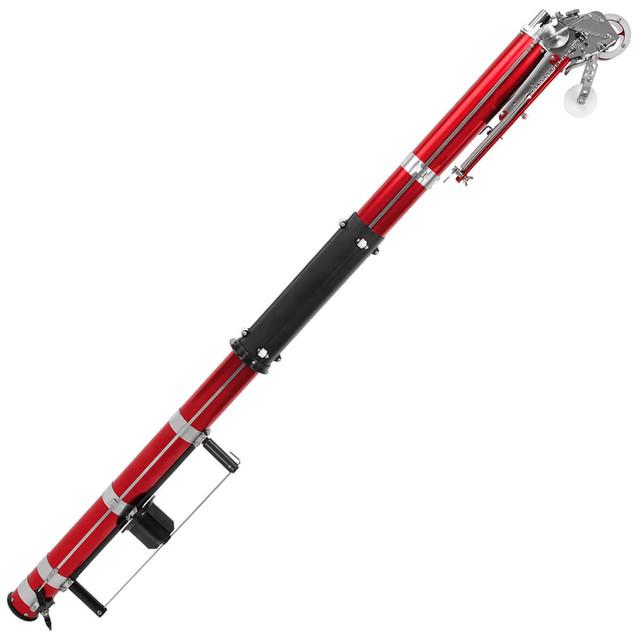
#1 Drywall Bazooka
A drywall bazooka, also commonly referred to as an “automatic taper,” is a specialized tool used in the drywall finishing process, specifically for taping and mudding drywall seams. It’s a valuable piece of equipment for professional drywall installers and finishers as it significantly speeds up the taping process and ensures consistent and efficient application of joint compound and tape.
The drywall bazooka is shaped like a cylindrical tube, resembling the appearance of a bazooka, which is where the nickname comes from. It consists of a main body, a spool for holding paper or fiberglass tape, a feed system for the joint compound (drywall mud), and various controls for adjusting the flow of mud and tape.
Here’s how a drywall bazooka works:
- Loading: The drywall finisher starts by filling the bazooka’s chamber with joint compound (mud). The joint compound is thinned to the desired consistency for smooth application.
- Tape Feeding: The tape is threaded through the spool on the bazooka, allowing it to be pulled out as needed during application. The tape is usually attached to the wall at the beginning of the seam to be taped.
- Application: As the finisher moves the bazooka along the seam, they squeeze a trigger or control mechanism. This action dispenses a controlled amount of joint compound onto the tape as it is simultaneously applied to the drywall seam. The tape is embedded in the wet joint compound, effectively taping the seam.
- Smoothing: After the tape is applied, the finisher uses a drywall knife to smooth and feather out the joint compound, ensuring a seamless and even finish.
The drywall bazooka is especially beneficial for larger drywall projects where speed and consistency are crucial. It allows for faster application compared to traditional manual taping methods, where joint compound and tape are applied separately. By automating the process, the bazooka reduces fatigue and helps achieve smoother and more professional-looking results.
It’s worth noting that while the drywall bazooka is highly efficient, it does require some skill and practice to use effectively. Proper technique is important to avoid over-applying or under-applying joint compound, which could lead to uneven seams. Overall, the drywall bazooka is a valuable tool in the arsenal of a professional drywall finisher, enhancing productivity and the quality of the finished drywall surface.
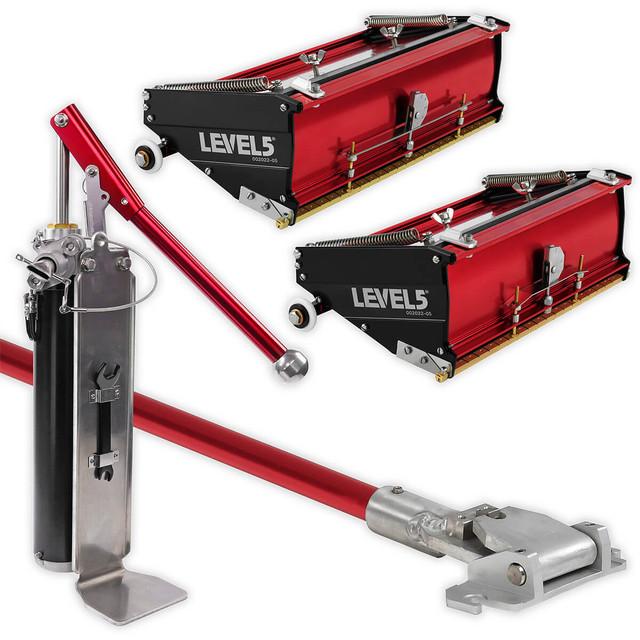
#2 Drywall Flat Boxes
A drywall flat box, also known as a “finishing box,” “mud box,” or “drywall box,” is a specialized tool used in the process of finishing drywall seams. It’s an essential tool for professional drywall installers and finishers to achieve smooth, even, and consistent finishes on joints and seams between sheets of drywall. The flat box is designed to apply and feather out joint compound (mud) over the seams, creating a seamless surface that is ready for further finishing or painting.
Here’s how a drywall flat box works:
- Design: A drywall flat box is typically rectangular in shape and consists of a main body with a hinged lid. Inside the box, there is a large metal blade, also referred to as a “wipe-down blade,” that spans the width of the box. The box is attached to a handle, allowing the user to hold and control the tool.
- Application: The flat box is used after the initial layer of joint compound has been applied to the drywall seam using other tools, such as a taping knife. The user opens the lid of the flat box, exposing the blade. The blade is then pressed against the seam, and as the user moves the box along the seam, the blade evenly spreads and feathers out the joint compound. This process creates a smooth and consistent finish.
- Feathering: The term “feathering” refers to the gradual thinning out of the joint compound as the user moves the flat box away from the center of the seam. This feathering action helps blend the joint compound into the surrounding drywall surface, minimizing the appearance of the seam.
- Adjustability: Many drywall flat boxes have adjustable controls that allow the user to set the amount of joint compound that is dispensed onto the seam. This feature allows for customization based on the specific needs of the project and the desired level of finish.
Drywall flat boxes come in various sizes, typically ranging from 7 inches to 12 inches in width, to accommodate different seam widths and project sizes. They are especially useful for covering larger seams, such as those between adjacent drywall panels. Using a flat box can significantly speed up the finishing process compared to manually applying and feathering joint compound with a taping knife.
It’s important to note that while a drywall flat box can make the finishing process more efficient, it does require some skill and practice to achieve optimal results. Proper technique, consistent pressure, and movement are key to achieving a smooth and professional finish. Overall, the drywall flat box is a valuable tool that contributes to the overall quality and aesthetics of a finished drywall surface.
#3 Drywall Sander
An automatic drywall sander is a specialized power tool used in the process of sanding and finishing drywall surfaces. It is designed to make sanding large areas of drywall more efficient and less physically demanding compared to traditional manual sanding methods. This tool is commonly used by professional drywall installers and finishers to achieve smooth and even surfaces that are ready for painting or other finishing touches.
I wrote up my personal review of the WEN Dustless Drywall Sander here.
Here’s how an automatic drywall sander works:
- Design: An automatic drywall sander consists of a handle or grip, a sanding head or pad, and a motorized mechanism that moves the sanding head in a circular or orbital motion. The sanding head is typically equipped with an abrasive sanding disc or pad that sands the surface of the drywall.
- Power Source: The tool is powered by electricity, often through a cord that plugs into a standard electrical outlet. Some models may have battery-powered options for greater mobility.
- Adjustability: Many automatic drywall sanders offer adjustable speed settings, allowing the user to control the sanding speed based on the specific task and type of drywall surface being worked on.
- Dust Collection: One of the significant advantages of automatic drywall sanders is their integrated dust collection system. These tools are equipped with a dust collection bag or attachment that captures the majority of the sanding dust as it is generated. This helps keep the work area cleaner and reduces the amount of dust released into the air.
- Sanding Process: To use the automatic drywall sander, the user turns on the tool and guides the sanding head over the surface of the drywall. The motorized motion of the sanding head, combined with the abrasive disc or pad, effectively sands down the high spots, ridges, and imperfections on the drywall surface. The sanding process creates a smooth and even finish.
- Safety Precautions: While using an automatic drywall sander, it’s important to wear proper safety gear, including a dust mask or respirator, safety goggles, and hearing protection. This will help protect you from inhaling dust and debris and prevent potential injuries.
Automatic drywall sanders are particularly useful for tasks like smoothing joint compound seams, feathering out mud, and sanding down textured surfaces. They significantly reduce the physical strain associated with manual sanding and help achieve more consistent and professional results. However, like any power tool, proper technique and practice are essential to using an automatic drywall sander effectively and safely.
Instructions On How To Drywall Mud
Now that we’ve covered the different types of drywall mud and the tools and materials you’ll need, let’s go through the step-by-step process for applying drywall mud like a pro.
Step 1: Prepare the Area
Before you begin, make sure to protect the floor and surrounding surfaces with drop cloths. You should also put on protective eyewear to protect your eyes from debris and splatters.
Mix the Drywall Mud (With Water, Not Dawn!)
Pour the drywall mud into a mixing bucket and add water until the mixture reaches the desired consistency. You’ll want the mud to be smooth and creamy, but not too runny. Use a mixing paddle to thoroughly combine the water and mud.
If you are applying drywall mud by the hand finishing method, it’s best to keep the mud slightly thick. When working with semi-automatic and automatic drywall tools, it should be thin (almost droopy).
Step 2: Prefill with QuickSet/Easy Sand/Durabond
You should always prefill by hand. I never recommend using a fast-setting joint compound in any automatic tools if you want the tools to last. If you are a beginner to fast-setting compounds, start with the highest number on the package, 20 means it hardens in 20 minutes, 45 means in hardens in 45, and so forth.
For this you will mix up your compound with water and fill in any large gaps. If you have large gaps where the fast setting compound falls out of, you can use either spray foam, or use fibafuse to make the wall flush. Think of it as building the wall out slightly, if seams are gapped 1″ or less.
While doing this step, I usually go through and nail-spot as well. Drywall nail spotting is the short term for, filling in each and every single one of these 32+ drywall screws per board until you slightly lose your mind because there are so many.
You’ll also want to go around any outlets you may have messed up along the way (it happens). Once everything is prefilled, you’re ready to begin the taping process.
Step 3: How To Tape Drywall Seams
Taping drywall seams is a crucial step in achieving a smooth and professional finish for your drywall installation. While there are various methods for taping, each with its own advantages, the goal remains the same: to create seamless joints that seamlessly blend into the wall surface. Whether you’re taping by hand, with a banjo, a semi-automatic taper, or the ultimate drywall taping tool – the bazooka – each method requires attention to detail and technique. In this guide, we’ll explore these methods, offering insights into their unique processes and benefits. By understanding how to tape drywall seams using these tools, you’ll be equipped to choose the best approach for your project and achieve impressive results that elevate the overall look of your drywall surfaces.
Taping Drywall Seams By Hand
Using a 4-inch taping knife, apply a thin and even layer of all purpose joint compound along the seam. Press the compound into the seam and wipe up any excess mud. It’s important to make sure the layer of compound underneath is smooth and evenly spread to avoid bubbles behind tape.
What If I Get Bubbles Behind My Tape?
Bubbles behind your tape will show just minutes after bedding the tape into the drywall joint. If you catch this soon, you can use your 4-inch knife to lift back the tape slightly, and apply more compound underneath. Again, be sure to wipe away any excess mud.
If you find bubbles behind your tape after it is dry, you will have to use a sheetrock knife to cut out the tape where the bubble is. Next you will reapply all purpose joint compound, and re-tape this small area you cut out. Do not skip this, it will show on the next coats if you don’t repair it.
Taping Drywall Seams With A Banjo
- Prepare the Banjo: Fill the banjo’s reservoir with thinned joint compound, ensuring it’s at the right consistency for smooth application. Thinning the compound helps it flow easily through the banjo’s mechanism.
- Thread the Tape: Thread a roll of paper or fiberglass drywall tape through the banjo’s tape guide, ensuring the tape is properly positioned to be pulled along the drywall seams.
- Start Taping: Begin at one end of the seam and hold the banjo against the wall at a slight angle. As you pull the banjo along the seam, the tape will automatically unwind from the roll while being coated with joint compound.
- Even Application: The banjo’s design ensures an even and consistent application of joint compound onto the tape. As you continue pulling the banjo, it embeds the tape into the compound, creating a secure bond and hiding the seam.
- Adjustments: Some banjos have an adjustable wing nut that allows you to control the amount of joint compound applied. Experiment with this setting to achieve your desired level of coverage.
- Bed The Tape: Once you have the tape holding itself to the joint, you’ll want to wipe down the joints with a 4″ (some people do 8″) to fully bed the tape into the joint. You’ll also be wiping away any excess compound from behind the joint, so keep your mud pan handy!
Taping Drywall Seams With A Semi-Automatic Taper
Similar to taping with a banjo, you’ll start by thinning out your mud with water. You’ll want to do this with a full 5 gallon bucket, which is why I recommend using a paint/mortar mixer.
Semi-Automatic tapers are designed to have the same affect as a banjo, except it comes directly out of the 5 gallon bucket – so there is no need for refilling like a banjo (unless you’re on a huge job). This method will require a separate empty bucket to hold the tape drawn from the full joint compound bucket.
As you begin pulling your tape through, it will have a thin coat of joint compound already on it. Adjust the wing nut to have a 1/8″ bead of joint compound on the tape as it dispenses. You’ll be pulling all of the loaded tape into the spare bucket for you to easily pull out of as you go along.
Pro tip: Unbuckle your belt, put the bucket handle with the tape in it through your belt, and tighten it back up. This frees you up to be able to use both hands for laying out the tape.
Once your bucket is loaded up, you’ll begin taping. Keep a 4″ knife in your back pocket and your mud pan handy. Starting with one edge, start putting the tape against the joint ensuring that the tape is tight. I usually hold one end of the tape steady with my left hand, pull out with my right and slap it against the wall so the tape sticks. Once you hit a corner, cut it using your 4″ knife, then go through and bed the tape (still with your 4″ knife) and wipe away any excess mud.
If you try or have tried this method – you will understand why it’s referred to as the slop bucket method.
Taping Drywall Seams With A Bazooka
This is the ultimate drywall taping tool that cannot be matched by hand or semi-automatic drywall tools. It is the most efficient for new builds and renovations.
- Load the Bazooka: Fill the bazooka’s mud reservoir with thinned joint compound. The compound should be smooth and easy to work with.
- Thread the Tape: Insert a roll of drywall tape into the bazooka’s tape holder, making sure it’s set up to unwind as you move.
- Start at One End: Begin at the beginning of the drywall seam.
- Pull and Press: Hold the bazooka at a slight angle and pull it along the seam. As you do, the tape will be coated with joint compound and applied to the seam. Similar to a banjo, except the tool does it for you!
- Even Application: Keep a steady pace to ensure the tape receives consistent compound coverage.
- Overlap Slightly: As you move, overlap the tape sections slightly for a seamless finish.
- Check for Issues: While working, check for wrinkles or air bubbles in the tape and smooth them out.
Once your tape is loaded on the wall, you’ll start going over it again with a 4″ knife, fully bedding the tape into the joint and wiping away any excess compound. On large jobs with more than one person, typically one person will run the bazooka, while the other follows behind bedding the tape and wiping the joint. It’s hands down the fastest way to tape a new build!
Step 4: How To Second and Third Coat Drywall Joints
Once the tape from the previous steps is fully dry, you’ll be moving on to the second and third coats. These steps are very similar, so I’ve compiled them to this section alone. The main difference you will need to know will depend on how wide your joint will be feathered with compound.
Butt seams should be anywhere from 16″-24″ after the third coat (my own preference is 24″, I like big butts. No pun!)
Factory Seams should be 12″ after the third coat
Corners should be feathered to 5″-6″, after bedding them with a 4″. This is also preference, but an inch difference isn’t a huge deal!
Second/Third Coat By Hand
Applying a second coat to a joint is a crucial step in achieving a seamless and polished finish for your drywall. Using a 10-inch taping knife, begin by loading a generous amount of joint compound onto the blade. Start at one end of the joint and hold the taping knife at a slight angle. With gentle pressure, glide the taping knife along the joint, spreading the compound evenly over the first coat.
For butt joints, you’ll be doing a 10″ wide coat on both sides of the joint, slightly overlapping.
Next you’ll feather the edges of the compound to create a smooth transition between the joint and the surrounding drywall surface. Work methodically along the length of the joint, applying the compound with consistent pressure. Keep the taping knife clean and wipe away any excess compound as you go.
The goal is to achieve an even layer that conceals the seams and imperfections while preparing the surface for subsequent coats. This step requires patience and attention to detail, as a well-executed second coat sets the foundation for a flawless finish.
Keep in mind that the second coat will shrink, so though it may look flat at first – you still have a third coat! The third coat will be the same process, but using a 12″ knife.
Second/Third Coat With Flatboxes
Applying a second coat to a drywall joint using a 10-inch flat box is a method that enhances efficiency and consistency. Load the flat box with a sufficient amount of joint compound, ensuring it’s spread evenly across the blade. Begin at one end of the joint, holding the flat box at a slight angle. Glide the box smoothly along the joint, allowing its width to evenly apply the compound.
The flat box ensures uniform coverage, feathering the edges for a seamless transition. Work systematically along the joint, applying steady pressure to the flat box. Clean the blade periodically to maintain a smooth application. This technique offers speed and precision, facilitating a consistent second coat that helps prepare the joint for further finishing steps.
When doing butt joints with flat boxes, overlapping will not work as it creates a trail in the mud. You can either use a 12″ taping knife to smooth out the butt joint. Another alternative is to do separate sides of the butt joint at 10″, and the following day do a swipe down the middle. Your final coat will be done with a 12″ flat box on joints, and however you see fit for butt joints.
Conclusion
In conclusion, drywall mud is an essential component of the finishing process in drywall installation. Its purpose extends beyond mere functionality – it transforms raw panels into smooth and polished surfaces, ready for paint or wallpaper. Whether you’re an experienced contractor or an enthusiastic DIYer, mastering the art of applying drywall mud is a skill that brings efficiency, quality, and pride to your work. This comprehensive guide has covered everything from understanding the different types of drywall mud to exploring a range of tools and techniques, each tailored to specific needs.
By learning about hand finishing tools, semi-automatic taping tools, and the unparalleled efficiency of automatic tools like the bazooka, you’ve gained valuable insights into how professionals achieve flawless drywall finishes. With step-by-step instructions for taping, applying second and third coats, and using flat boxes, you’re equipped to embark on your drywall projects with confidence.
Remember, whether you’re smoothing seams, feathering corners, or coating joints, attention to detail and practice make all the difference in achieving results that reflect your dedication and expertise. So go ahead, apply drywall mud like a pro and take pride in the impressive transformation you bring to your spaces.