
Today I’m sharing my guide and my personal recommendations for using drywall mud on your next DIY project. I’m a drywaller by trade. I do patches, brand-new installs, and renovations as my main job in Upstate NY. I’ll be diving into the purpose, types, where and how, how much, and how to get your drywall project to look as good as a professional!
The Purpose of Drywall Mud
Drywall mud is another term for joint compound. We get this name because of its mud-like consistency, but it’s obviously not actual mud. Drywall mud is really a compound made up of gypsum dust, water, and some additives (depending on what you use).
The additives in the joint compound help for various projects, depending on which phase of drywall finishing you are doing. The main purpose of drywall mud is to fill in areas in walls to give everything a flat and smooth surface when complete.
Before we had sheetrock/drywall, it was very common to use plaster and lathe. So there were no boards before then. Plasterers would come in and plaster an entire home because sheets of drywall didn’t exist yet. When sheetrock was invented, it took off because it eliminated the need to plaster an entire interior. Today, we are left with bevel ends, and butt ends to apply drywall mud.
Types of Drywall Mud
There are various types of drywall mud out there. To make this easier to understand, I’m going to summarize it into three categories:
- Hardening Compound
- All-Purpose Joint Compound
- Finishing Joint Compound
Hardening Compounds
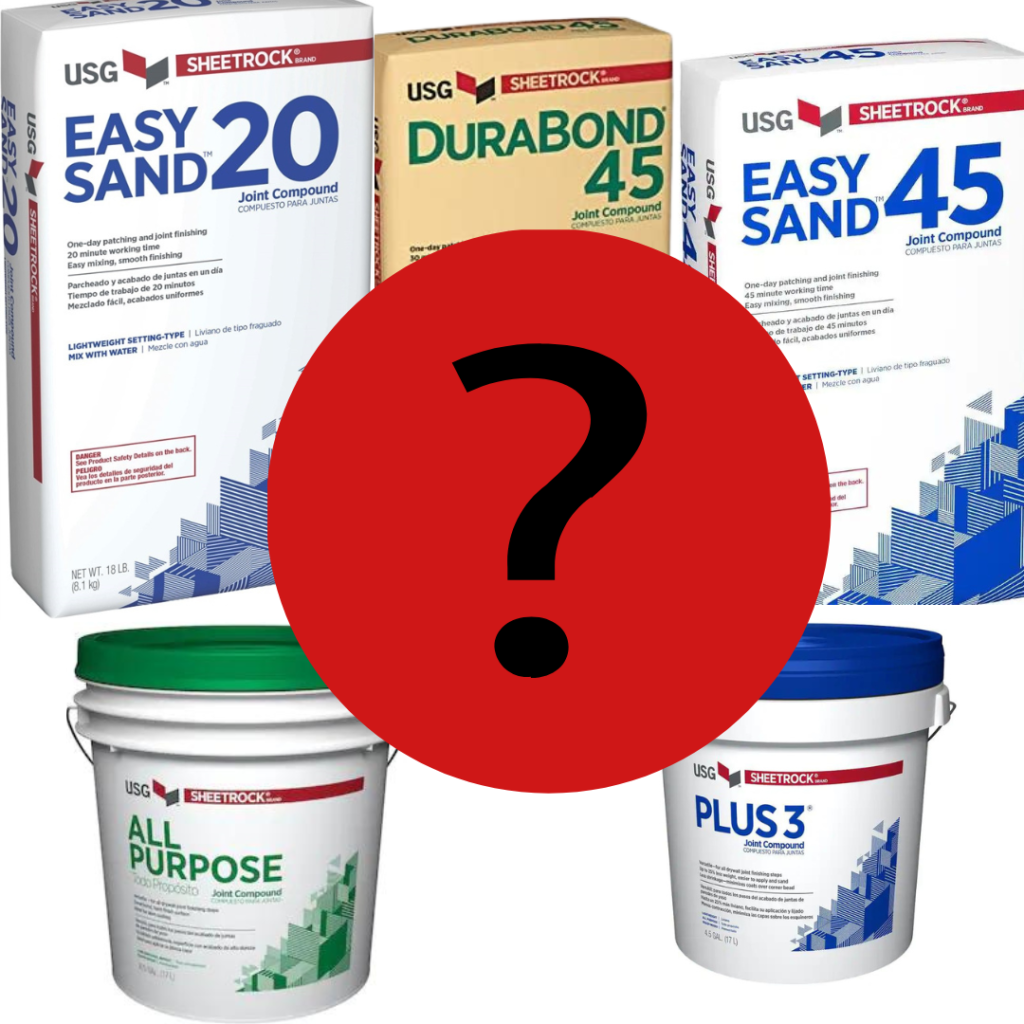
I’m sure you’re asking, doesn’t all drywall mud harden? And yes, it does. However, there are certain types of drywall mud that accelerate the hardening process. The most common brand names for these hardening compounds are Quick Set, Durabond, and Easy Sand. These can be found at any local hardware stores
For the sake of not complicating things, each of the hardening compounds serves the same purpose. These are each made to accelerate hardening times within a certain amount of time. For example:
- Durabond 90 – Hardens within 90 Minutes when mixed with water
- Quick Set 20 – Hardens within 20 minutes when mixed with water
- Easy Sand 45 – Hardens within 45 minutes when mixed with water.
Hopefully, you can see the point!
Where to Use Hardening Drywall Mud
For these types of compounds, many contractors will use hardening drywall mud to speed up the process of a job. In other terms, they don’t necessarily have to wait 24 hours between coats of drywall mud, they are more likely to get multiple coats of drywall mud in one day. But I’d stay away from using these products on a large project if you are a DIYer.
The reason I don’t recommend using this as a DIYer is that these types of compounds require you to work fast, and it also leaves very little wiggle room for mistakes. If you do mess up, this mud is extremely hard to fix and sand compared to other types of drywall mud. I do however recommend you use it in certain areas if you want to prevent future cracking!
The Best Areas to Use Hardening Compound As A DIYer
If you’re going to be using this drywall mud on your DIY project, I recommend using it as a gap filler for gaps between the drywall sheets. It’s very common to make a small mistake when hanging your own drywall and end up with a large gap.
Normally on a job where I am finishing the drywall where a customer has hung the drywall sheets, the very first thing I will do is fill any gaps using a 20-minute or 45-minute compound. Since this applies to DIYers, I think you should go with a 45-minute compound to give you plenty of time to fill in any gaps. Once all of your gaps are filled, it’s time to move on to an all-purpose joint compound!
All-Purpose Joint Compound
All-purpose drywall mud is marketed to be used for all phases of drywall finishing. I typically use all-purpose drywall mud when taping drywall. The reason I personally tape with all-purpose is due to its shrinkage. With hardening drywall mud mentioned before, it is a low-shrinkage compound. All-purpose though, will shrink when fully dried.
I use this shrinking to benefit the drywall project I am on. When applying your first coat of drywall mud to the recessed factory joints and butt joints, the all-purpose compound will “suck” the tape into the joint. To me, this makes the two drywall panels I’m joining together more solid in the long run.
If there is a smaller job in that I am applying drywall mud, I will use all-purpose for all phases of drywall finishing. In order to accomplish this, I will typically thin my drywall mud with water to make it much easier to work with. You can thin your drywall mud each time you grab more mud, or you can mix it all at once using a large mixer.
Drywall Mud For Finishing
If you have a larger project and want to make the final step of sanding easier, I recommend using a finishing compound. These will typically have a blue lid in stores. Plus3 & Dust Control are finishing compounds found at Home Depot and Lowes. Using these for your final coat of drywall finishing will save you on sanding.
When I personally compared sanding hardening compounds and all-purpose compounds, finishing compounds are the easiest to sand.
How Much Drywall Mud Should I Use?
A general rule of thumb is to use 1, pre-mixed gallon per 100 square ft. Most pre-mixed drywall mud will come in 3.5 to 4.5-gallon containers. This should be enough to cover the tape coat, second coat, and third coat. If you are ever in doubt about how much drywall mud you’ll need, grab an extra and leave it inside your home so it doesn’t freeze. If you never end up using it, local hardware stores have their return policy in place.
How To Speed Up Drywall Mud Dry-Time
There are two items you should consider to speed up the dry time of drywall mud. A dehumidifier and heat. Using both will dramatically speed up the drying process. Since drywall mud is a compound mixed with water, once the water is out of the mud, it’s good to go. Drywall mud dry time is usually within 24 hours. But, if you’re in a damp area like a basement – it could take longer!