How to Get a Smooth Finish on Drywall
Achieving a smooth finish on drywall can transform the entire look of a room. I still remember the first time I tackled a drywall project in my own home; it was a daunting task, filled with anxiety about whether I could achieve a flawless finish. I spent countless hours researching techniques, gathering tools, and ultimately discovering tips that allowed my walls to shine. In this article, I’ll share that experience and guide you through achieving that coveted seamless finish on your drywall.
Why a Smooth Finish Matters
Drywall is often the foundational element in the aesthetics of your home’s interiors. A smooth finish not only enhances the appearance but also sets the stage for paint and other wall coverings. A well-finished wall reflects light evenly and can even make a smaller room feel larger.
Essential Tools and Materials
To achieve a smooth finish, you need the right tools and materials. Here’s what you will require:
Tools
- Drywall Taper: Essential for taping joints.
- Mud Pan: For holding joint compound.
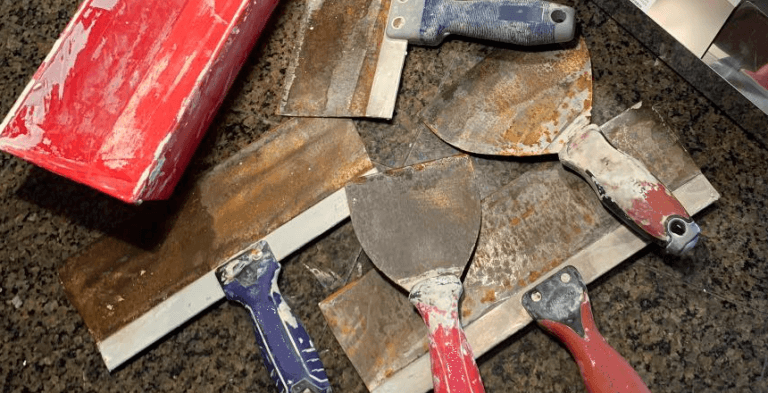
- Drywall Knife: A 6-inch knife for applying joint compound and a larger 12-inch knife for feathering.
- Sanding Block or Sander: A handheld or powered drywall sander for smoothing the compound. The WEN Drywall Sander from Amazon is highly recommended for this.
Materials
- Joint Compound: Standard and lightweight options available; I’ve had great success with Plus 3 Lightweight Joint Compound, which you can find here.
- Drywall Paper or Mesh Tape: Use paper tape for better strength, especially on butt joints. For general seams, fiberglass mesh tape is also effective.
Preparing for the Job
Step 1: Properly Cut and Install Your Drywall
To avoid callbacks and unnecessary patches, ensure your drywall is cut precisely to fit the wall area. Make clean cuts and avoid damaging the paper facing. Use long screws (like the 1 1/4" Drywall Screws) placed at appropriate intervals for a secure hold.
Step 2: Taping the Joints
Using drywall tape correctly is vital for a strong joint:
- Embed the Tape: Apply a thin layer of joint compound over the joints and embed the tape into the compound.
- Smooth Out: Use the drywall knife to smooth the tape into the compound, ensuring there are no air bubbles.
Step 3: Apply the First Coat of Compound
- Apply a Thin Layer: Spread a thin, even layer of joint compound over all joints and screws.
- Be Precise: Aim for a smooth and even coat without overloading the knife.
Sanding Techniques for a Smooth Finish
After the first coat has dried (typically 24 hours), the sanding begins. Here’s how to do it effectively:
Step 4: Lightly Sand the Surface
Scrape down any high spots and feather the edges of the compound using a fine-grit sanding block. It helps to use a dust extractor like the Compact Dust Extractor to minimize dust.
Step 5: Apply Additional Coats
You will likely need at least two more coats of joint compound:
- Second Coat: Apply a slightly wider strip of compound than the first coat.
- Feather the Edges: Use your wider knife (12-inch) to feather the edges and smooth the surface, allowing it to blend seamlessly with the drywall.
Step 6: Final Sanding
Once the final coat dries, it’s time for the last sanding pass. Use a fine-grit sandpaper or a powered sander to achieve a silky smooth finish. Here’s a pro tip: look for any shiny areas; these indicate high spots that need to be sanded down.
Common Mistakes to Avoid
- Over-sanding: It can lead to revealing the joint tape. Always err on the side of caution.
- Using Too Much Compound: This can lead to clumping and an uneven finish.
- Skipping Primer: Always prime your drywall before painting to ensure an even coat.
Pro Tips for a Seamless Finish
- Condition the Compound: Mix the joint compound thoroughly before application. A well-mixed compound ensures better adhesion and a smoother finish.
- Light Reflection Check: After sanding, use a direct light source to help identify imperfections.
- Apply Primer: A quality drywall primer prepares the surface for painting, allowing for a more even and rich finish.
Choosing the Right Primer
When selecting a primer, choose one designed for drywall. Related: Drywall Primer vs. Regular Primer is a great resource for understanding this choice.
Conclusion
Getting a smooth finish on drywall does require patience, but with the right tools, materials, and techniques, it’s entirely achievable. Start with proper preparation, use the right methods for taping and applying joint compound, and don’t skimp on sanding.
Are you taking on a drywall project soon? What tips helped you achieve smooth walls? Share your experiences and ask any questions below!
Share & Resources
If you found this guide helpful, please share it on Pinterest, Facebook, or Reddit! Your support helps others find useful drywall repair techniques.
Contractors, home improvement bloggers, and DIY forums: Feel free to link back to this article to help your audience with expert drywall repair tips.
Together, let’s empower our communities with the knowledge to improve our homes, one drywall project at a time!