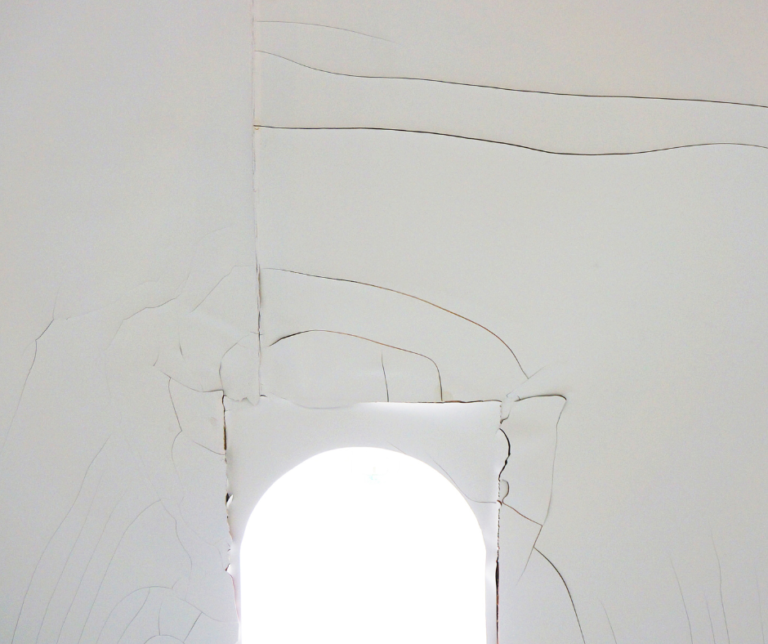
How To Repair Hairline Cracks – Plaster Walls
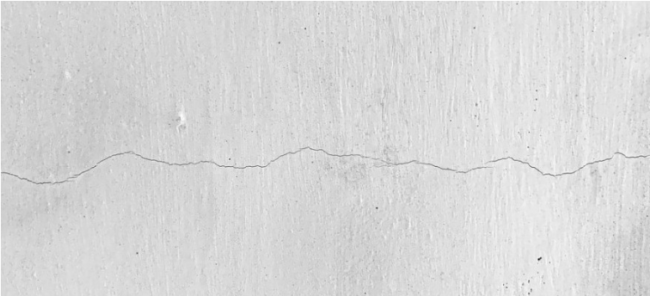
If you’ve been looking for a guide on how to repair hairline cracks, you’ve come to the right place. To give you a little bit of background, my name is Joe. I’ve been running my own business called Patch Pros in Upstate New York for many years now. As the owner-operator of Patch Pros, I handle a wide variety of calls for drywall and plaster wall repairs. The type of repairs I do are usually quick patches, repairing hairline cracks in plaster walls, or repairing wall damage from plumbing leaks. I also handle new builds or additions for drywall installation. I have a lot of experience in the field as it is my day-to-day bread and butter. I carry a 5-star rating across the board on my reviews and I love what I do. I’m here to tell you that repairing hairline cracks on plaster walls doesn’t require a ton of skill. In fact, if you consider yourself an average DIYer, you can definitely repair a hairline crack. So, let’s get to it!
Make Sure You Have The Right Tools
Lucky for you, in order to repair a hairline crack on plaster walls, you do not need an arsenal of tools. When I get a call for repairing a hairline crack, I consider it a light day. All I need with me is a Sheetrock knife and only two taping knives, but you can accomplish it using one. The world of taping knives can be complex so I’m going to educate you and eliminate any confusion.
Taping knives run in many sizes, there are your small “spackle” knives and your larger knives for what is called skim coating (I’ll get to that in another article). I consider a spackle knife to be anywhere from 1” to 2”. The rest I just call taping knives. Taping knives run from 3” to 24”. But like I said, for repairing a hairline crack on a plaster wall, you can get away with one. Since this is a pretty small hairline crack, I’d recommend starting with either a 6” or an 8”.
If you are looking for a comparison of different knives to purchase, check out my article, Best Drywall Taping Tool set – A Professional Drywallers Guide.
Products To Repair Hairline Cracks On Plaster
There are so many products out there so I definitely understand how it can be overwhelming to choose. For this project, you’ll want to use either a pre-mixed joint compound OR a compound that comes in powder form. I’ll explain the big differences between them.
If you happen to be shopping at your local hardware store, Home Depot, or Lowe’s and you go to the drywall section there is no doubt you will be overwhelmed with the choice of products you have. As a little side story, there are times when I am out shopping and my girlfriend asked me to get her something. This usually happens in the feminine product section which I have no clue about. You walk into the aisle only to see a wall covered with the same product by different brands all claiming they do the same thing. So I picked the one that seemed to be the best option, the colors of the box spoke to me with their excellent marketing, and before you know it I’m at the checkout with what she asked for. Then I get home and show her that I got what she asked for, “that’s not what I needed.” Ever since then, to eliminate any confusion I always tell her she must send me a picture of the exact product she wants. So in order to help you be able to repair the hairline crack on your plaster wall, I’m going to tell you the exact products to use.
If you’re shopping at Home Depot:
USG All-Purpose Joint Compound 3.5 quarts (aka “Green Lid”)
OR Easy Sand 20 (differences in the next paragraphs)
AND FibatapeⓇ 1 ⅞ x 180 ft Self Adhesive Drywall Mesh Tape
AND 3M 2.875 in. x 4.875 in. x 1 in. 120 Grit Fine Angled Drywall Sanding Sponge
If you’re shopping at Lowe’s:
USG Sheetrock Brand All-Purpose Joint Compound 1.75-Pint
USG Sheetrock Brand Easy Sand 20
AND Marshalltown 2 in x 50 ft Mesh Construction Self Adhesive Tape
AND Gator 220-Grit Commercial Sanding Sponge 5-in x 3-in
If you’re shopping on Amazon:
As an Amazon Affiliate, I earn from qualifying purchases.
Now as you can see each of the products is essentially the same, just in a different store. One thing to notice is that Lowe’s does carry a smaller-sized all-purpose compound, as well as a smaller roll of mesh. If you’re doing a very small job this will help you save money.
All-Purpose Joint Compound vs. Easy Sand 20 To Fix Hairline Cracks on Plaster Walls
An all-purpose joint compound is made for all phases of drywall finishing. It comes in a premixed container so there is no mixing involved. All you have to do is open the container and you’re ready to go.
Easy sand 20 is mostly used for quick patches in the construction industry. I have used both products many times. The difference is that the Easy Sand 20 comes in powder form. It is a chemical compound that, when mixed with water, sets (hardens) within 20 minutes. Keep in mind that just because the compound is hard does not necessarily mean that it is cured. I have used this product many times to repair hairline cracks in plaster walls because of the advantage it gives me as a contractor by saving time.
If you are not in a rush to repair the hairline crack on your plaster wall, I would recommend going with the all-purpose joint compound. Once you apply this compound you should wait and let it cure overnight before you apply a second coat.
If you are in a rush to repair the hairline crack on your plaster wall, I would recommend using the easy sand 20. This product will allow you to save time because after it hardens in 20 minutes you are able to coat it a second time and then wait for it to dry. If you are in an extreme rush and want to get this done within 2 hours from starting, you can use a fan or blow dryer(trade secret) to speed up the process.
The Process To Repair Hairline Cracks On Plaster Walls
- Apply the self-adhesive mesh.
- Apply a thin coat of joint compound over the mesh using your taping knife.
- Allow all-purpose compound to dry (typically overnight) or if you used easy sand, wait 20 minutes until it’s hard to the touch.
- If you used all-purpose, coat it again, this time applying it wider. You’ll want it to be about 6″- 8” wide when you’re done.
- Sand down until smooth.
If you end up sanding too much and can still see the mesh tape, you’ll want to apply another thin layer and sand again. The goal here is now to hide the mesh and make the surrounding surface blend in. Try and focus more on the edges of the dry compound. If it is smooth to the touch and you can’t feel any rough edges, it won’t be noticeable when you paint over it.
And You’re Done!
I hope this guide was able to educate you and help you be able to repair hairline cracks on your plaster walls! If you ended up trying this out yourself, how do you think you did? If you haven’t started the project yet, which joint compound will you use and why? Let me know in the comments below!