How To Paint A Bathroom Ceiling
In today’s How To Paint A Bathroom Ceiling guide, I’m going to explain how you can get the best look on your bathroom ceiling, cover up stains, and how you can tackle issues if they happen during the process. Before you begin, it’s important to have all of the right tools!
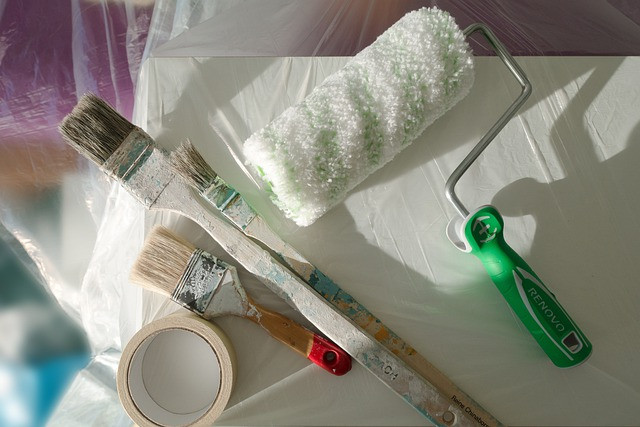
The Tools You’ll Need To Paint Your Bathroom
- A cloth/Swiffer to remove dust from corners.
- A step ladder or workbench.
- Paint Brush
- Paint Roller Cover ⅜” Nap
- Paint Roller
- Paint Tray
Optional Items:
- Painters Tape
- Painters plastic
- Extension Pole for a paint roller
How To Paint A Bathroom Ceiling – The Optional (But Recommended) Items
Painters Tape
I’ve covered a few optional items because it really depends on how large the bathroom is, how tall the ceilings are and how “seasoned” you are as a painter. Many professionals do not use painter’s tape all the time, but it’s very handy to have.
If you’re unfamiliar with painter’s tape, it is similar to scotch tape. It is meant to act as a layer of protection for adjoining walls that your brush or roller may accidentally hit. As a professional painter, I have a pretty steady hand for corners. But there are times it should be used.
You should use painters tape if:
- You’re a beginner at interior painting
- You have to paint a tight area between two pieces of trim.
- If my brush is too large and has to squeeze between a tight area, I will use painter’s tape to protect the trim from the paint.
- You are painting drywall close to wood.
- Wood is very porous and if you get a little bit of paint on it, it will be very hard to get out (even when it’s still wet). As a precaution, I will use painter’s tape on these areas.
Painters Plastic
The main concern when it comes to painting is getting the paint exactly where it needs to go. Unfortunately, spills and splatters happen when painting. Having a thin plastic will help just in case any spills are made. Also, since you are painting a ceiling – paint drips are most likely to happen.
When we get to brushing in the edges of the bathroom ceiling, there’s a good chance that paint will begin to slowly drip down from the paintbrush. So, using painter’s plastic will be beneficial if you get any minor or major spills. I also cover up any items in the room.
When you’re painting any ceiling, it’s a good idea to lay painter’s plastic over any items in the room. Since we’re in a bathroom for this project, there shouldn’t be too many items to cover. The reason we cover all of the items is from paint specks.
When we roll paint back and forth on a ceiling, there will typically be very small specks that fly off of the paint cover. They may not be noticeable immediately, but definitely something you’ll notice after you roll on paint.
Extension Pole for Paint Roller
I added this as optional because it really depends on how large the bathroom is. If you’re in a small bathroom with low-height ceilings and don’t want to spend extra money, by all means, you can paint the bathroom ceiling without an extension pole. I do find it easiest on larger bathrooms, but they can always be done with the roller and no extension.
How To Paint A Bathroom Ceiling Step By Step
Step 1: Preparation
Dusting: In order to have a smooth process for painting the bathroom ceiling, I like to begin by dusting the ceiling off. This removes any spiders, debris, or webs that may be on the surface and corners. This can be done using a Swiffer duster or a clean rag.
Lighting/Bathroom Fan: If you have a ceiling light or bathroom fan, it’s a good idea to slightly pull it away from the ceiling. If this step is too much trouble to do, you may want to apply painter’s tape around it. This way you won’t get any paint on the unit.
Edges: If you haven’t painted a ceiling before, I recommend putting painter’s tape around the perimeter of the room. Precisely where the wall and ceiling meet, apply painter’s tape to the wall as straight as you can get it. This will be your paint line.
Painters Plastic: If you chose to use painter’s plastic, cover up anything that has a slight chance of getting paint on it. Bathtub, Shower, Cabinet, Toilet, Etc. I’d also place a sheet across the floor so no paint gets on the floor.
Step 2: Cutting In The Bathroom Ceiling
The first thing you’ll do is use your paintbrush to get all of the ceiling edges first. You’ll be dipping the paintbrush into the can of paint, then clearing excess off of the edge of the paint can. I personally prefer to start about 2 inches away from the edge, do 8-12” brush strokes back and forth, and work my way into the corner.
If you have a light or bathroom fan, you’ll want to cut in around that using your paintbrush. No worries if you hit the tape with paint, that’s why we used it! Next, you’ll begin rolling the paint.
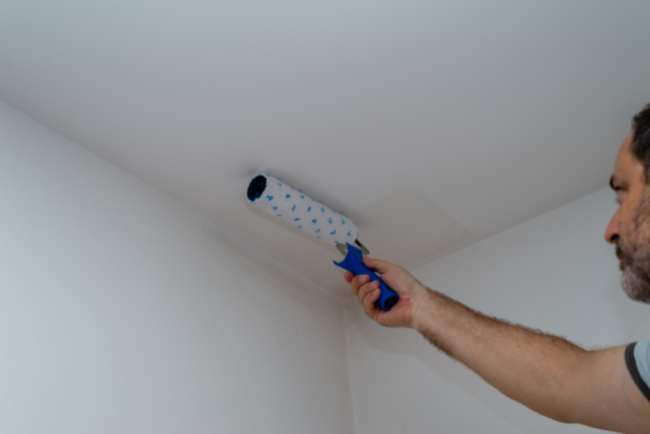
Step 3: Rolling On The Paint
Rolling the paint is probably my favorite part (compared to cutting in). You cover a whole lot of square footage in a short amount of time with the paint roller. Using your paint tray and paint roller with a ⅜” nap cover on it, pull some paint up the incline of the paint tray and roll it up and down. You’ll want to do this until the paint roller is holding plenty of paint evenly. Begin rolling the paint onto the ceiling.
As you roll paint onto the ceiling, you’ll want to overlap each row by ½ the size of your roller. So if you’re using a 9” roller, roll the next row halfway over the previous row. You’ll notice the roller will naturally create paint lines. This is due to the pressure difference from one end of the roller to the other end. A trick that I use to get rid of paint lines, is to “Back-Roll”.
What is Back Rolling?
Once the paint has been rolled onto the ceiling, back rolling is the process of going back over the ceiling again with your roller (without paint) – in the same direction for each “row”. This helps smooth out any lines and creates the same direction of “lift” from the roller.
You’ll do this process until you’re happy with the results. Depending on the type of paint you used, most bathroom ceilings can be done in either 1 or 2 coats.
Should I Prime My Bathroom Ceiling?
If you’re in doubt, you can. Though it doesn’t always have to be done. Primer is very cheap compared to paint. However, if you have stains on your ceiling, I definitely recommend using a stain-block primer before you paint.
I have three different products I will use depending on the situation.
For Ceiling Stains:
For Killing Mold:
Mildew Resistant Primer For New Bathroom Ceiling:
Conclusion
I hope this guide was effective in helping you paint your bathroom ceiling! If my article helped you out in any way, would you do me a favor and write me the comments below? I’d love to hear your feedback and experience with how you did.