A Drywallers Story: Hairline Crack That Keeps Coming Back
Maybe you’ve tried to fix the hairline crack 2-3 times now, but still – it continues to come back. It’s extremely frustrating after the second time, you may have been like me and tried to watch it dry in hopes the hairline crack was gone. But nope. It appears again. Why is this happening? There can be quite a few factors in why. So I’m going to walk you through a job I personally did, where I thought it was a day quick fix. But it actually turned into a second day.
The “Quick” Hairline Crack Job
In 2020, I was in my second year of business doing drywall. I received an estimate request from Brian and he said his wife can’t stop looking at this large hairline crack going across their ceiling. He needs it fixed asap. He said they recently had their ceiling painted, and the painter had tried putting a coat of mud on it but it came back.
So I came and checked it out. From my first impression, it had just looked like two seams had separated slightly, and the area just needed a few screws, then to be re-taped.
I sent Brian and his wife their estimate for a day worth of work, which they gladly accepted. They wanted this hairline crack gone!
I walked into the job site and began my usual preparation. My prep work starts with a drop cloth or plastic, getting my tools inside, and getting my ladder set up and ready. Once my prep work is done, I get right to it.
On any hairline crack, I begin by applying pressure to the surrounding drywall. In this case, since it was on the ceiling – I pushed against each side of the hairline crack to see how much “wiggle” room it had. It was quite a bit, no more than an eighth of an inch.
Because I was able to wiggle each side slightly, that told me that I was working with two sheets of drywall above me. No drywall will be able to move like that unless it is a seam where two sheets join.
Make A V Cut In Your Hairline Crack
As I normally do with hairline cracks, I began by taking my sheetrock knife and making a V-shaped cut down the hairline crack. This gives me a rough surface for the joint compound to adhere to and creates a better bond between the two sheets. Once the V cut was down the entire crack, next is the taping and mudding.
On any hairline crack I repair, I use self-adhesive mesh tape. This allows me to apply the tape to the ceiling first, it sticks, then I’m able to mud over it with joint compound. Once this first ‘tape coat’ has been applied, I go through the drying process.
Since I’d rather not sit there for 24 hours and watch the joint compound dry, I use a blow dryer to speed up the process. I applied two more finishing coats of finishing joint compound to the ceiling while blow-drying between coats. And finally, I began sanding the area down to smooth it all out.
After Painting, The Hairline Crack Reappears
So the final thing for the job was to prime and paint the now-dry joint compound. I painted and told the customer Brian I would come back the next day to inspect it before collecting payment. I always want to make sure the customer is happy before I take any money!
The Hairline Crack Is Back!
Brian texts me back the next morning. “The hairline crack came back.”
I’m thinking shoot, what did I do wrong? This has never happened before when I’ve repaired hairline cracks. Is it the house? A leak? What is causing this hairline crack to come back over again?
Brian says, “If it costs you another day of work, I don’t mind paying you more.” I told him no worries, you hired me to fix it – So I’m going to. I tried the “easy fix”. It didn’t work.
“Do you mind if I open up the ceiling and see what the underlying cause is?” I say. Brian said “Whatever you gotta do”
Beyond The Hairline Crack
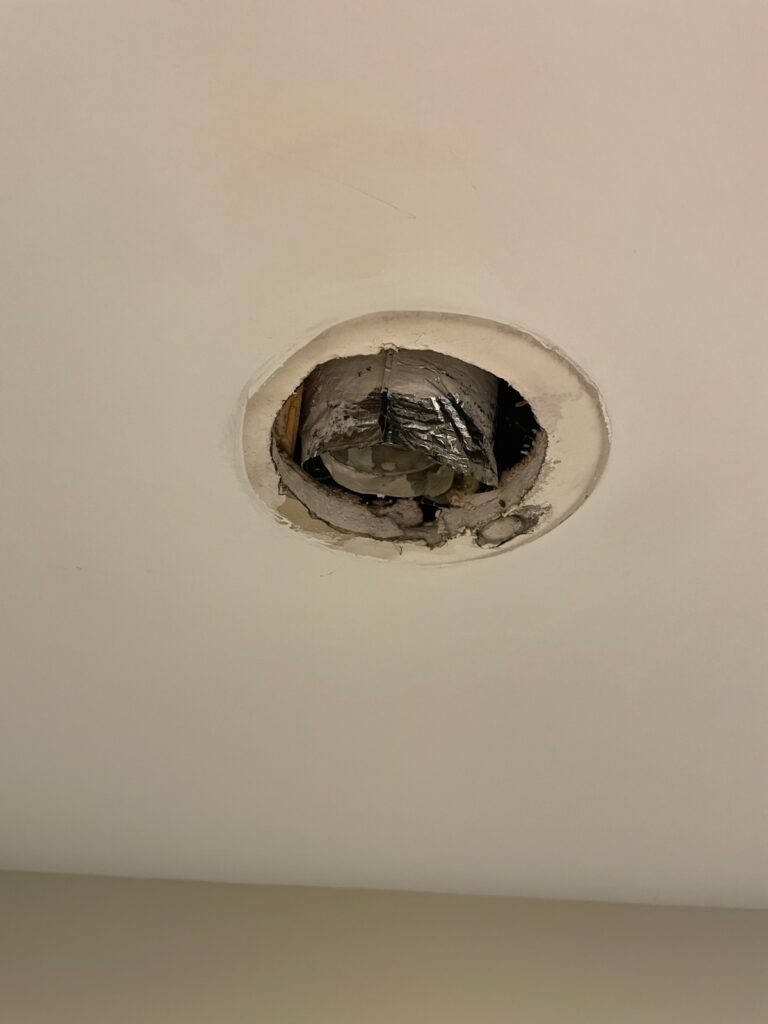
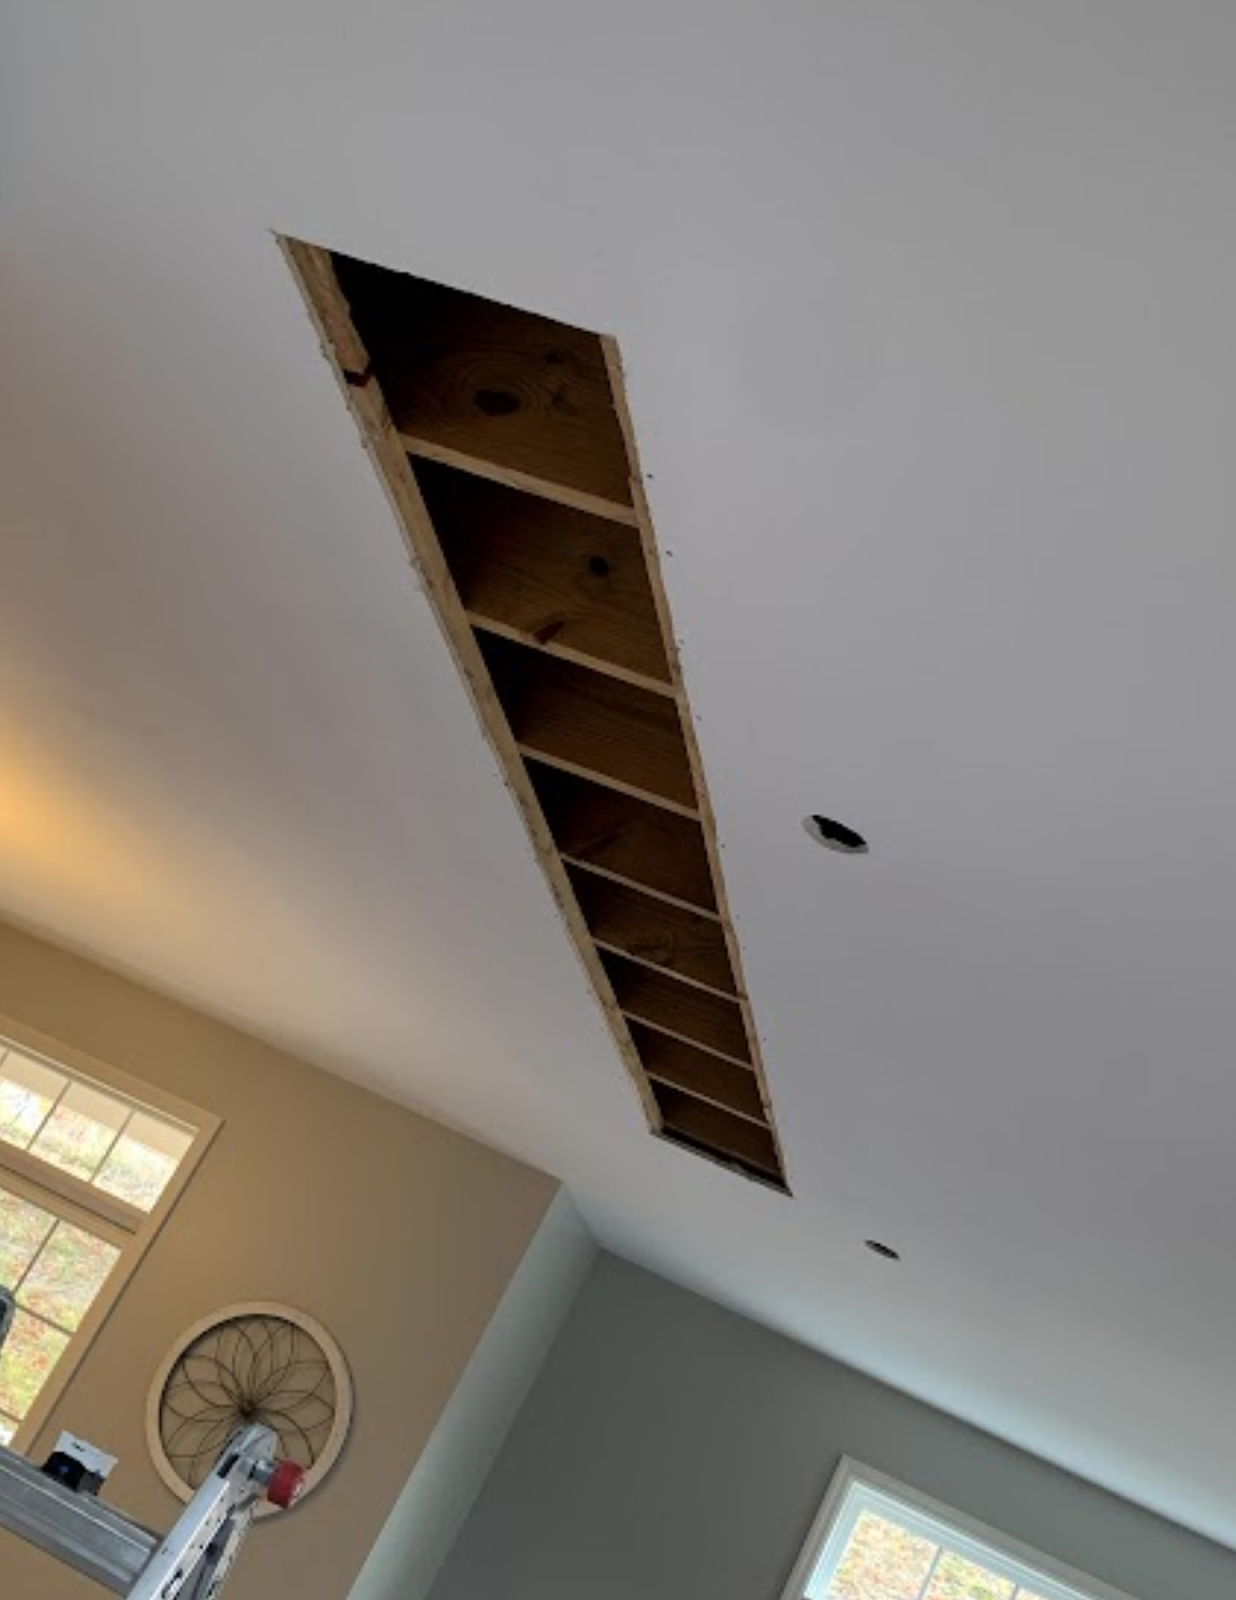
Since I got permission to cut a hole in his ceiling, I re-prepped the living room and got back to it. The first thing I did this time, was cut a hole big enough so that my phone could fit through it. What this allows me to do is record a video with the flashlight on, so I can put the phone up inside the hole to see the issue. Ready for it?
What Caused The Hairline Crack?
Once I got a good picture of what was happening behind the ceiling, I could tell that this wasn’t going to be fixed with tape or mud.
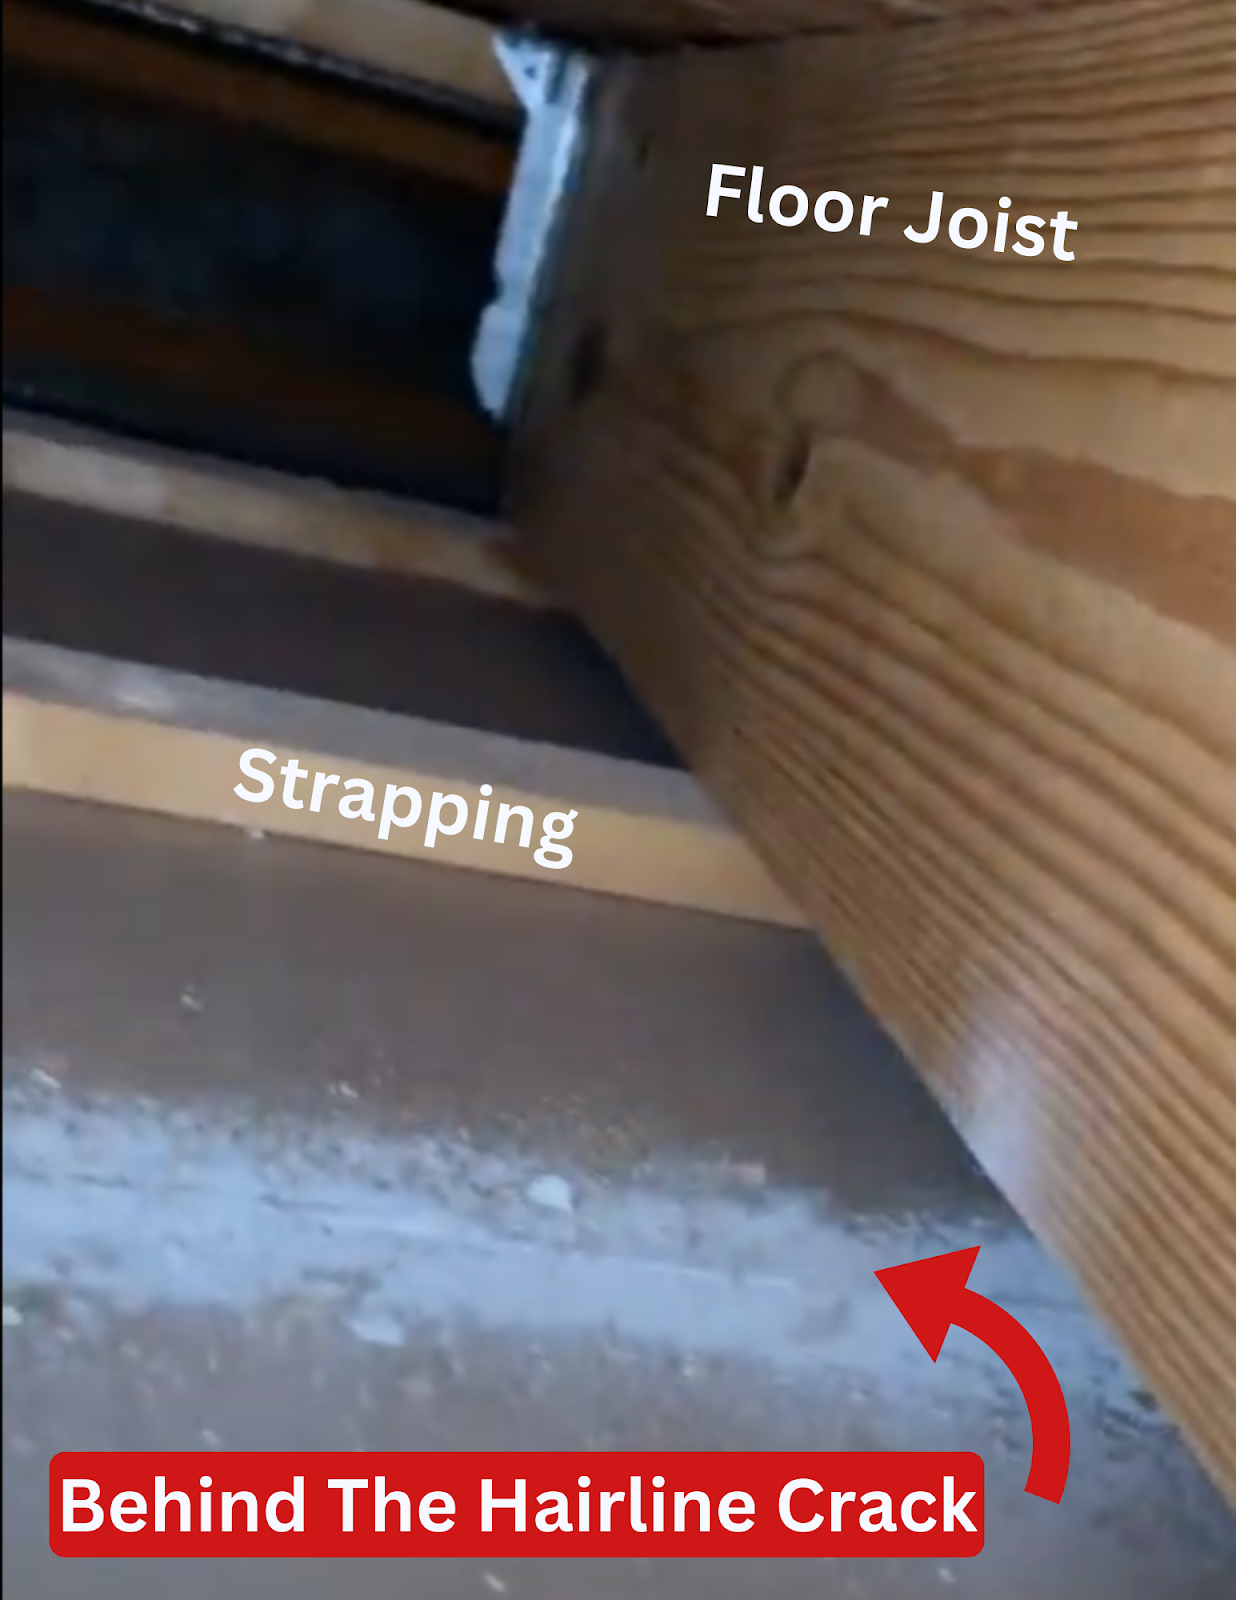
The main cause of this was due to the drywall installer. As you can see in the above photo, the drywall was actually cut directly down the center, which is where the hairline crack appeared on the surface.
Anytime there is any cut made in drywall, there needs to be some type of backing; something to join the two sides together (not mud and tape). If for some reason you cannot make the backing work, at a minimum I would only allow 2-3” to be “floating” like that. In this case, each end of the drywall had a 6” – 8” on each side of wiggle room. This is not okay!
How I Finally Fixed The Hairline Crack
Due to this small hairline crack being caused by the drywall installer – there was no quick fix to this project. At this point, I told him I will have to remove about 1ft wide drywall for however long the crack was (I believe it was about 10ft long).
- Once the drywall was removed, I added a drywall patch to the area and secured the drywall with fasteners.
- Next, I mudded and taped just like I did in the very beginning, except this time I mudded and taped all four sides of the drywall patch.
- I used a finishing joint compound 2 times around the patched area until it was fully blended into the ceiling.
- I sanded the area with minimal dust using my vacuum-attached WEN Drywall Sander.
- Finally, I painted the area using the paint and primer supplied to me.
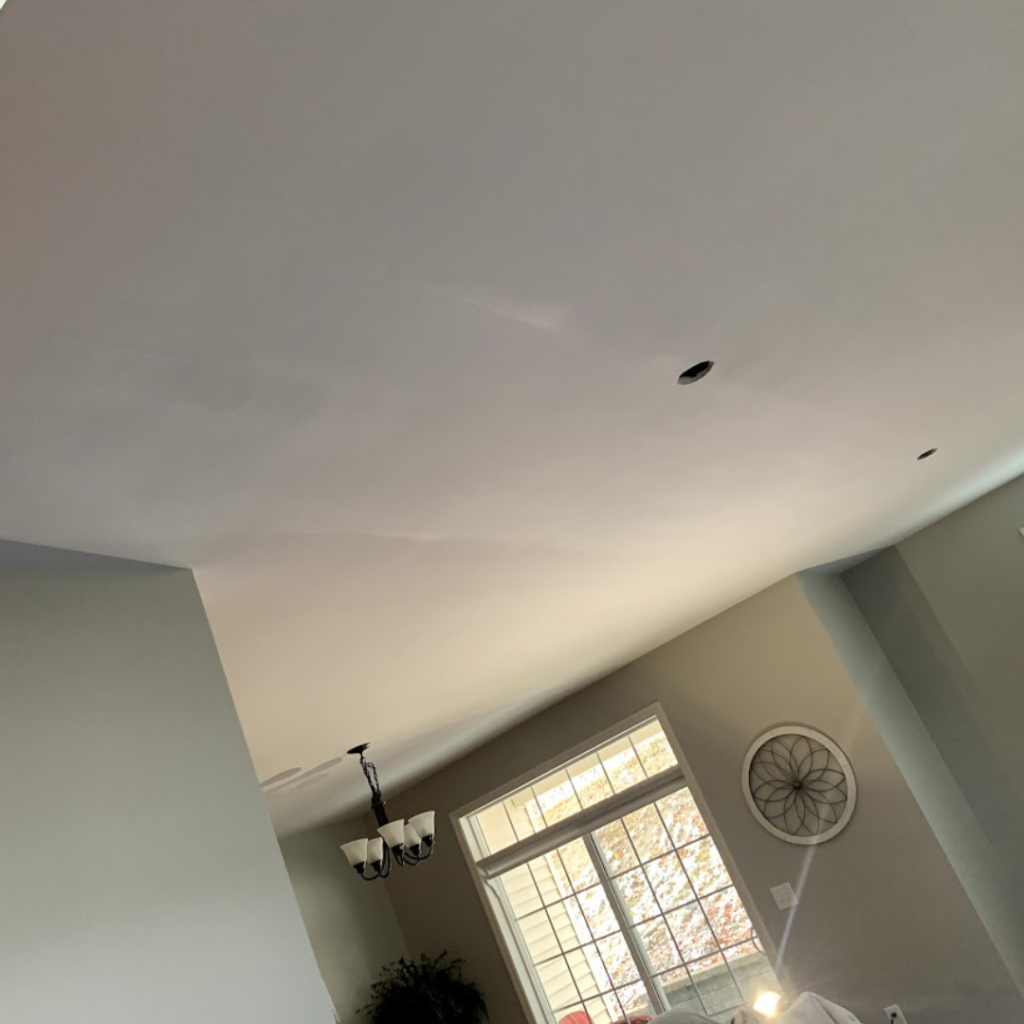
And zero callbacks!
I didn’t hear from him for a couple of months after this job – He ended up hiring me for other things around his home!
Here’s the final shot I got before I painted!
This Job Was Different
Normally, repairing a hairline crack in drywall is a quick fix and can take less than a day. I learned an extremely valuable lesson in this case – that things aren’t as easy as they sometimes appear to be. I mean, I’ve heard it in life, but I didn’t think it would apply to repairing drywall.
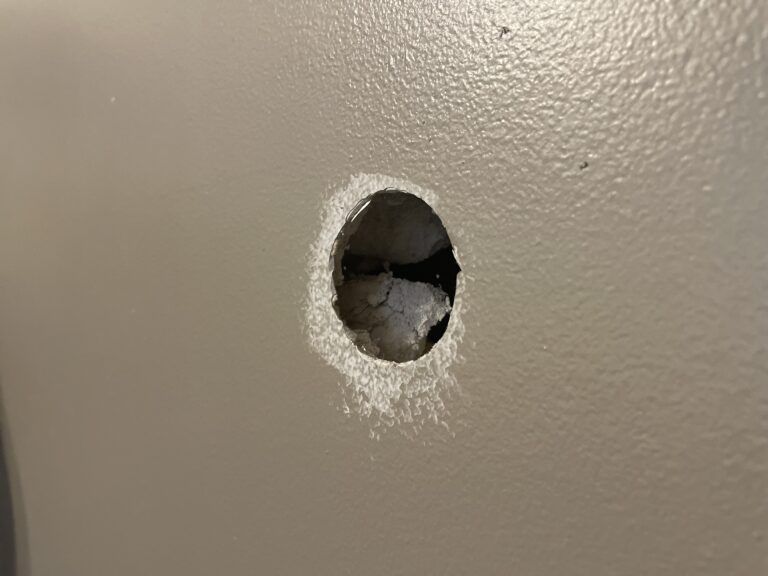
If I were to do this job differently, I would have drilled a pilot hole directly in the center of the hairline crack first. If I ended up not hitting anything – I’ll know exactly what caused it and the proper way to fix it more efficiently.
Let me know if this is what ended up being the problem, and how you went about fixing it!