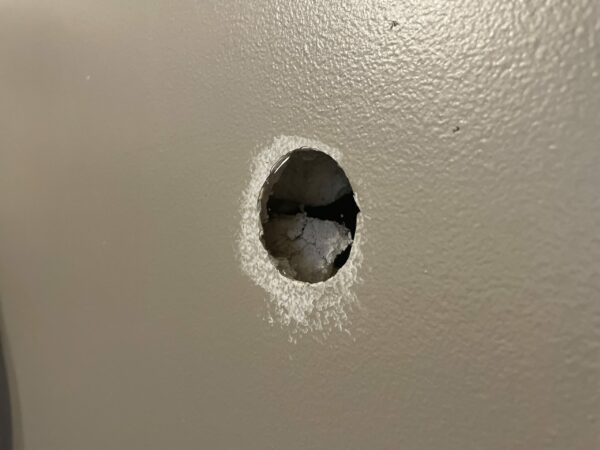
How To Fix A Hole In Drywall Wall
Today I’m going to be going into detail on how to fix a hole in your drywall wall. Some of the most common causes of drywall damage are from moving large items, door knobs slamming into the adjacent wall, or a leak has saturated the wall to the point of no return
If this is your first time at Drywall Central, I’m Joe. I run a business called Patch Pros out of NY and I get calls for fixing holes in drywall all the time! It is very common, but a lot of my customers do not know a lot about repairing drywall. I’ve created this blog to walk homeowners and DIYers through fixing their drywall. From a contractor’s honest* perspective, small repair work can be more costly than a homeowner expects – this is due to the fact that there aren’t many patch guys around. If you are ready to save money and get it done, this guide is for you!
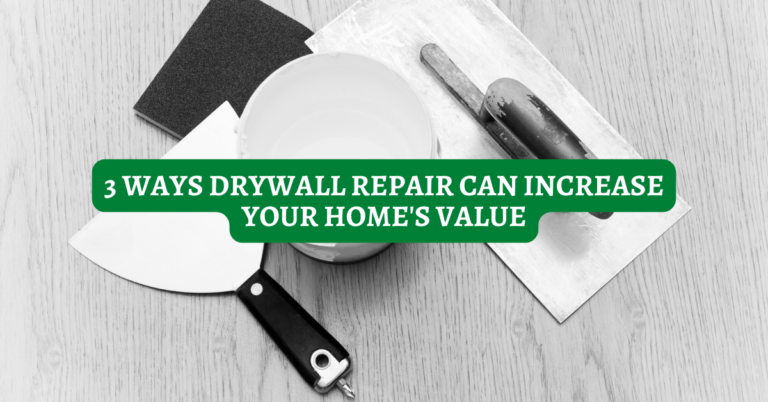
What You’ll Need
If you’re ready to fix this eyesore in your wall, you may/may not need to invest in some tools to get it done. I’m going to show you two different methods depending on the size of the hole. Method 1 will require more tools than the other, take more time, but will be more effective. It should be used for larger holes (greater than 6” but less than 15”). Method 2 requires fewer tools and is much quicker, but if someone were to bump into the same area again-it may not hold up as well. This method should be used for holes no smaller than 1” and no larger than 6”. These are two main factors in determining how I will go about fixing the hole.
Conventional Method
A small piece of sheet rock
Tape measure
Screw Gun
Drywall Screws
Drywall Clips
Paper Joint Tape, or Mesh Tape
All Purpose Joint Compound
Sheetrock Knife
Taping Knives
Sanding Block
Drywall Clips can be often hard to find in-store, if you prefer Amazon:
California Patch
A small piece of sheet rock
Tape Measure
Sheetrock knife
Taping Knife
All-Purpose Joint Compound
Sanding Block
If you don’t own a set of taping knives, I recently wrote an article “Best Taping Tool Set – A Professional Drywallers Guide” that discusses different types of taping knives, as well as shows where you can find the best deals online! If you’re looking for a budget-friendly and DIY taping knife set on Amazon, I’ve provided a link below. As an amazon affiliate, I earn from qualifying purchases.
10 Steps of How to Fix A Hole In Drywall Wall (Method 1):
1. Using a sheetrock knife/oscillating tool/drywall cutout tool, cut the hole into a square.
2. Measure out the area using your tape measure – the length and width of the square.
3. Hold half of the drywall clip behind the wall, and the other half on the open hole – carefully place a screw in the drywall so it catches onto the drywall clip from behind the wall. Repeat this so you have a drywall clip at 12 o’clock, 3 o’clock, 6 o’clock, and 9 o’clock on the square.
4. Cut the new piece of drywall to match the size of the hole.
5. Place the new piece into the hole, and screw it into the drywall clip.
6. Using your taping knife, apply joint compound evenly over the seams of the hole.
7. Apply paper tape over each seam, and press the paper tape into the surface to remove the excess compound from behind the tape. It should be relatively flat. Allow 24 hours to cure.
8. Coat the area another time with joint compound, this time making it wider. The wider the compound is spread, the more it blends into the wall. At this step, I usually use an 8” or a 10” taping knife – depending on the size of the hole. Allow this coat to dry again for 24 hours.
9. Repeat process 8 if you would like a flatter, barely visible surface when done. If you don’t care as much – you can sand at this point.
10. Sand the surface under GOOD lighting. The lighting will show any imperfections in the compound. I generally work my way from the center, then to the outside edges. If you can feel edges when you rub your hand against it, it will show when painted over.
Steps of How to Fix A Hole In Drywall Wall (Method 2 – California Patch):
This process is more in use by those in the drywall industry. The method has been named the California patch, and you do not need any drywall clips, screws, or paper tape for it. What you’ll be doing is actually utilizing the new drywall (with its paper still attached) to create the bond. Keep in mind, that doing this is not as strong as method 1, but it does work. If this is an area with high traffic and may be bumped into again, or if you’re patching a ceiling, I recommend using method 1.
1. Using a sheetrock knife/oscillating tool/drywall cutout tool, cut the hole into a square.
2. Measure out the area using your tape measure – the length and width of the square.
3. Cut a piece of drywall 2 inches larger than the actual hole in both directions. Example: if your hole is 5”x5”, cut the piece of drywall to 7”x7”.
4. Flip the piece of drywall you just cut, so the brown paper side is facing you. Using the example measurement, you will be carving (not cutting fully) into the brown paper side, making a 5” square within the 7”x7” area. This means your carve will be 1” around all 4 sides of the square (like uneven tic-tac-toe). See the video short below.
5. Peel off the areas you just cut, but leave the white paper on the drywall piece.
6. Dry fit the patch into the hole, making sure it fits.
7. Next, apply compound to the wall around the hole or apply compound directly to the california patch you just made. Place it into the hole.
8. Using a taping knife, smooth the patch into the wall focusing on removing excess compound from behind the paper. Allow this to dry for 24 hours.
9. Coat the area another time with joint compound, this time making it wider. The wider the compound is spread, the more it blends into the wall. At this step, I usually use an 8” or a 10” taping knife – depending on the size of the hole. Allow this coat to dry again for 24 hours.
10. Repeat process 9 if you would like a flatter, barely visible surface when done. If you don’t care as much – you can sand at this point. If not, coat it again with joint compound, allow 24 hours to dry, then sand the area under good lighting.
Conclusion
In this article, I explained two different ways how to fix a hole in a drywall wall. These are both the most effective and efficient ways to get your walls back to how they looked before. If you have any questions/comments or need more information, please leave them in the comment section below. I personally respond to every comment left! Thank you again for reading, and best of luck on your drywall project!