The Truth About Water Damaged Walls
Water Damaged Walls – What Do I Do?
If you have water damaged walls, it can eventually lead to a more serious issue in the future. I have worked on these types of repairs for many years and I’d like to share some insight to help you. Whether you are planning on it being a DIY project or in the process of waiting for a restoration company to come.
I’m Joe, the author at Drywall Central. My full-time job is doing drywall, I install drywall, repair drywall, and fix water damaged walls. I maintain a 5-star review across the board with my work, and I started this blog to educate others about the drywall trade and common drywall issues homeowners may face.
Is Water Damaged Drywall A Big Deal?
In short, it might not be yet – but it likely will be. Regular drywall is not mold/mildew resistant. Plaster, however, is resistant. There are certain types of drywall that are more resistant than others – but that doesn’t mean you won’t get mold eventually.
Drywall is very porous, so it absorbs water easily. Water damaged walls are especially an issue when the water has been behind the surface. This leaves a moist and dark environment for mold to grow in. Mold is less likely to be apparent on the outside surface of a wall – but you will be able to see the starting stages with the naked eye.
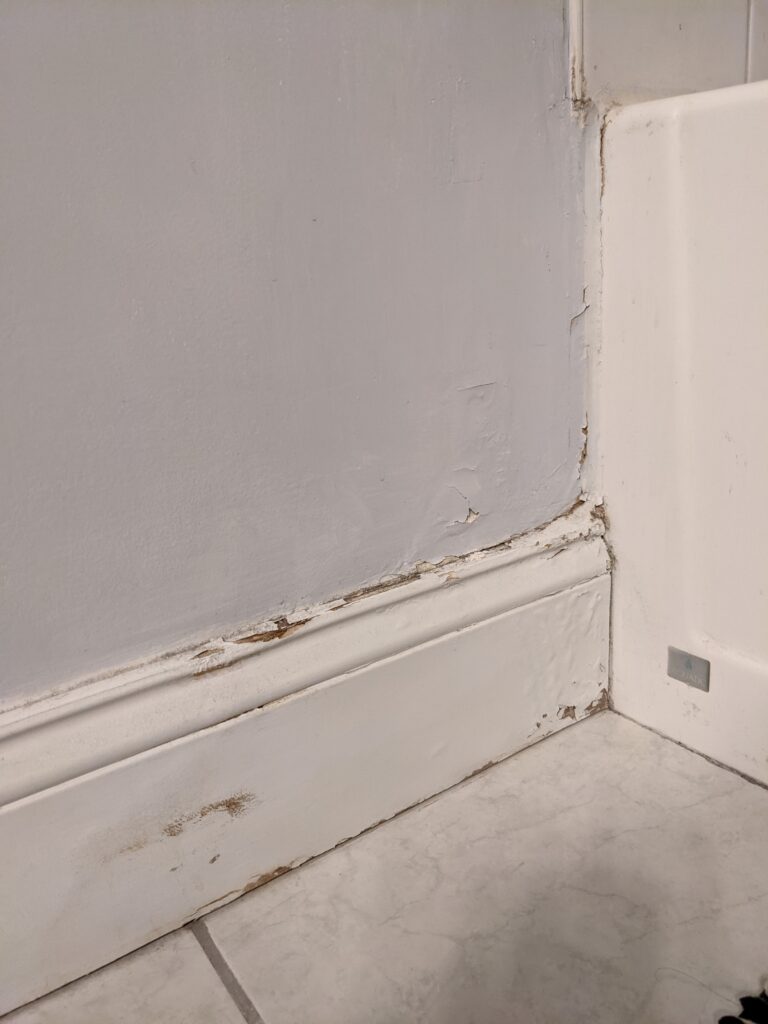
On a particular job I recently had, I was called in for water damage near the floor of a shower. The outside of the wall did not look terribly bad – but you could notice signs of water damage easily. The signs were bubbled paint. When I began the repair, the wall was very soft and would squish and move slightly at the faintest press against it. The paint bubbles would easily scrape off. Rather than sealing the area with an oil-based type primer, the best plan of action was to take out the drywall and do a patch.
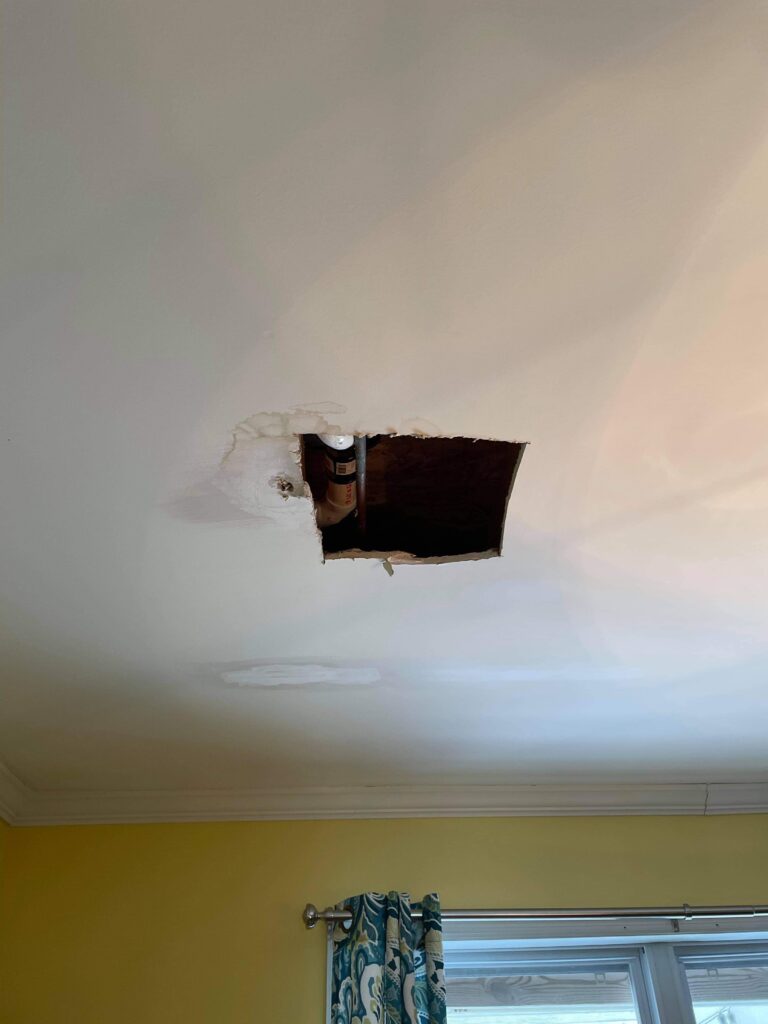
Here is a photo of what the surface of the water damaged wall looked like – You can also see the water damage on the trim as well.
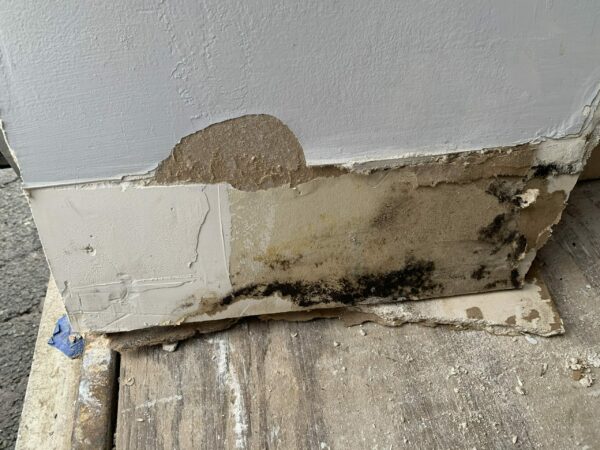
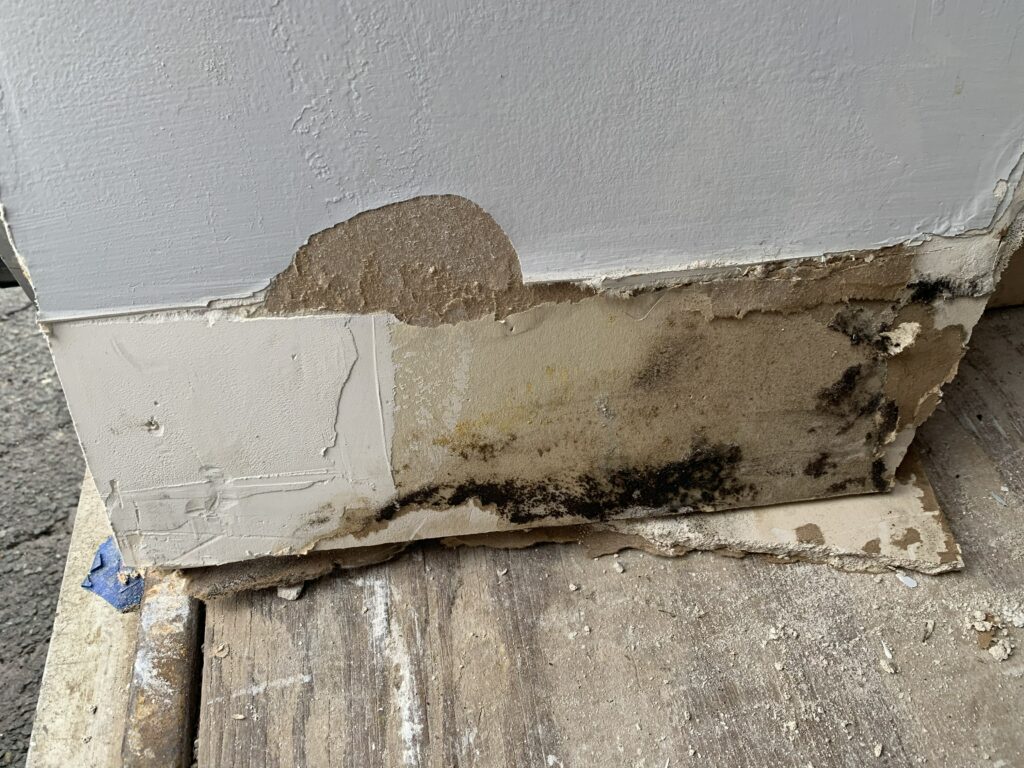
I think we can all agree it does not look too bad at the surface, more of an eyesore. But here are some photos of what was growing behind the surface.
Water Damaged Walls – Find The Cause First!
On this particular job, the cause of the water-damaged walls was water dripping outside of the bathtub while the customers showered. This is a very common cause of water damage in homes and I have run into it many times. Other common causes of water damage that I have repaired have been roof leaks or plumbing leaks. These things are bound to happen to any homeowner.
Any time you run into a leak, you have to find the cause of it first. I tell any customer, repairing the water damaged wall is only a Band-Aid if the cause is not taken care of. So if you do have a roof leak – address that first. If you do have a plumbing leak – take care of it first. Plumbers will often do the necessary repairs and leave the wall open. This way a drywaller or homeowner can take care of the drywall patch.
How You Can Fix It
As shown in the images above, I wanted to fix the issue right away – by removing it from the home. If you are uncomfortable with these types of repairs, I recommend looking for a water restoration company near you. If you decide to DIY, I will share the steps I did for this repair.
The first thing I did was have the proper protection – I used a 3M Respirator that is certified for mold, as well as safety goggles and gloves. Since I do this type of work daily – I use a half-face respirator with disposable filters – but an N95 mask will work and filter 95% of particulates.
As an Amazon Affiliate, I earn from qualifying purchases.
When you have all of the protective gear on and are ready to begin, have a trash bag or contractor bag handy. You will first start by removing the area of the wall and inspecting for any further damage. Water damaged walls will be soft and ready to crumble. The best way of knowing where to stop your cut is by feeling and bending the wall. You are looking to see if it breaks or crumbles easily.
Removing Moisture From Drywall
When you have the wall area and/or trim cut, you should dry the area thoroughly. I recommend using a dehumidifier for at least a week. I purchased one years ago for my basement to prevent mold growth there, so I often borrow it and bring it to jobs when it’s needed. I use this dehumidifier because it gives me the option to drain directly out or it can collect inside of it until it’s full.
As an Amazon Affiliate, I earn from qualifying purchases.
Once the area is fully dried out, you can begin doing your drywall patch. This part can be different depending on your situation – and I have written a few articles about how to patch a drywall hole, and a DIY mudding guide to help you with the process.
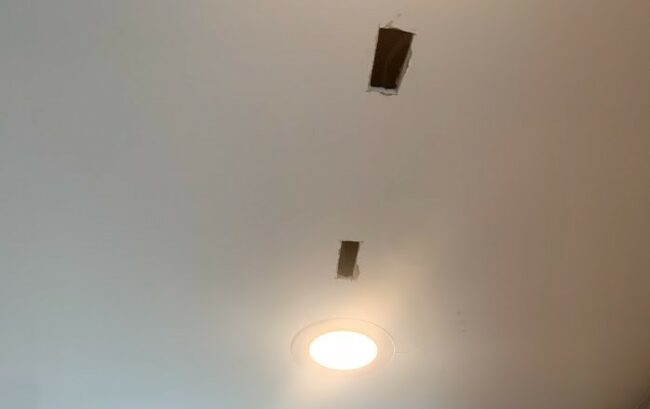
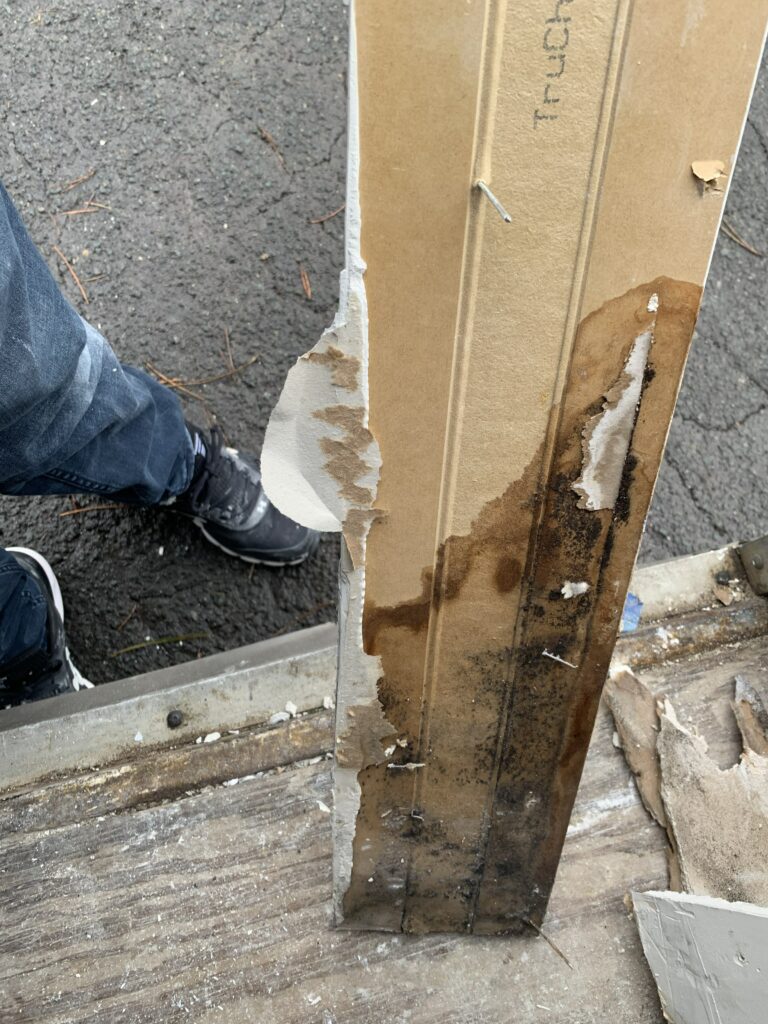
How To Trim Water Damaged Drywall
In the images above, I had to remove about a 1’ x 1’ area of drywall as well as the trim from next to the shower. As a DIYer you may not be too familiar with the different types of trim – but from a professional standpoint, the type of trim that was next to the shower was not a good choice. It is called MDF trim, and it is very porous – it should not be used in areas of moisture, especially next to a shower. If you run into a similar issue in your home and have to replace the trim, use primed pine. It can be found at your local home depot or lowes.
Water Damaged Walls – Steps
- Wear hand, eye, and lung protection.
- Inspect the wall for crumbling/softness.
- Remove the portion of the wall that is soft. Go beyond the area to be safe.
- Dry the area using a dehumidifier.
- Reinstall a new sheetrock patch.
- Tape and mud the joints.
- Prime and paint the area.
I hope this article helped you and gave you more information about your water damaged walls. I would love to hear your story about your water damaged walls! If you currently have a water damaged wall – what is your plan of action? If you had a water damaged wall, what did you do to get it fixed? Let me know in the comments below!