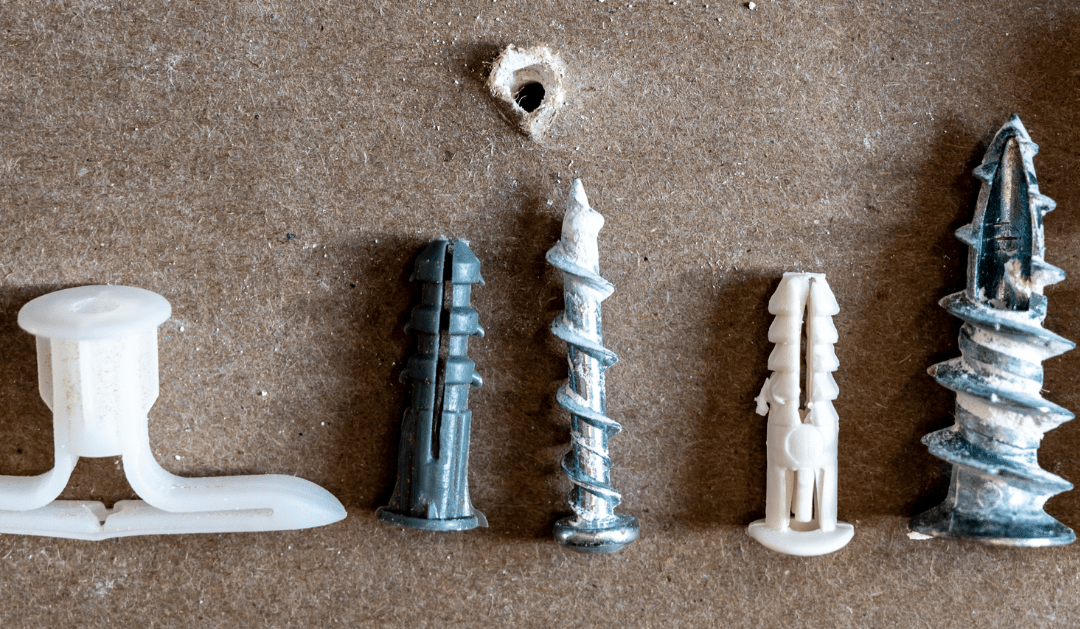
DIY Guide: How To Remove Plastic Drywall Anchors
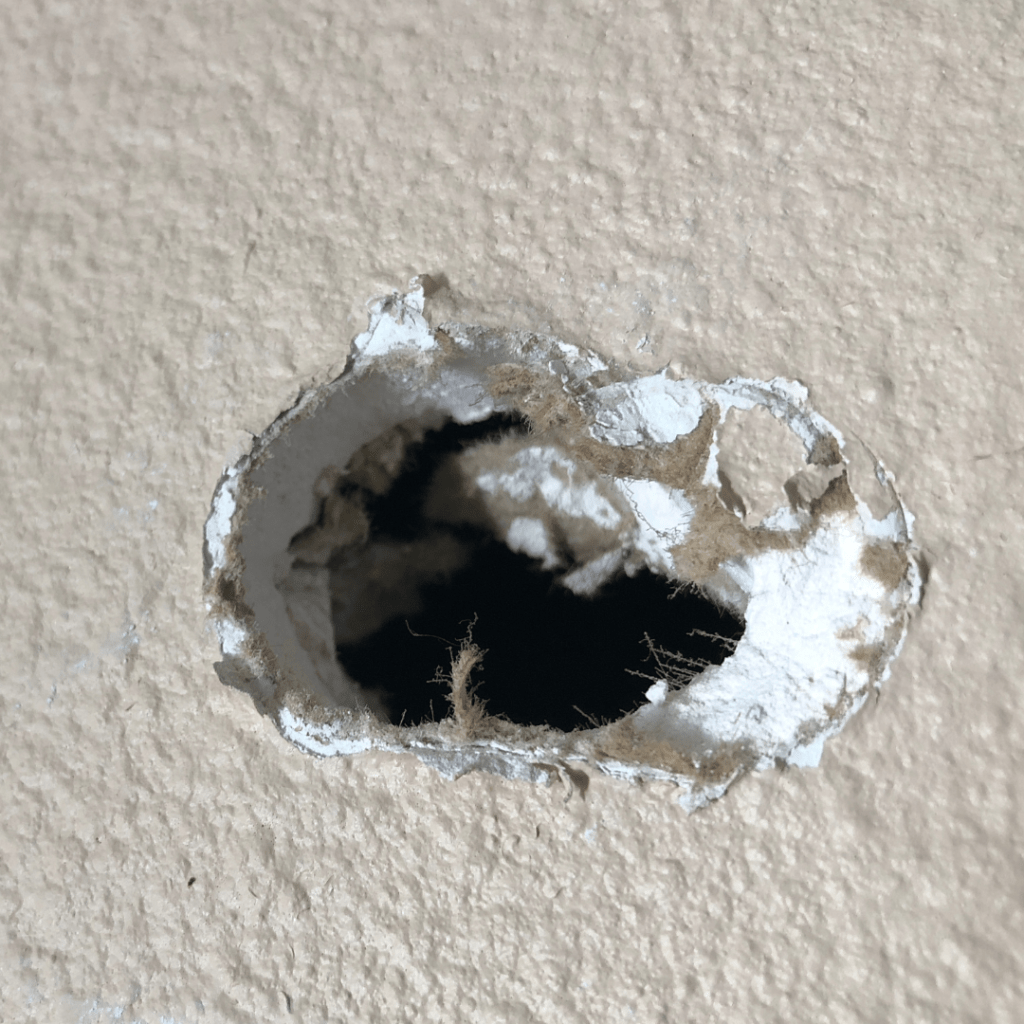
Plastic drywall anchors are handy tools for securing items to your walls, but what do you do when you need to remove them? Removing plastic drywall anchors may seem like a daunting task, especially if they lack the familiar Phillips head (+) for easy unscrewing. Fortunately, we’ve got you covered with three effective methods to tackle this challenge. Each method has its own level of difficulty and impact on your drywall, so you can choose the one that suits your needs. In this guide, we’ll walk you through the step-by-step process of safely removing plastic drywall anchors, ensuring a clean finish that’s ready for patching.
Method 1: Push and Patch
If you’re looking for the easiest way to remove a plastic drywall anchor, this method is for you. It’s a straightforward process but may require more extensive drywall patching afterward.
Materials Needed:
- Screwdriver or similar flat tool
- Drywall patching compound
- Putty knife
- Sandpaper
- Paint (matching your wall color)
Step-by-Step Guide:
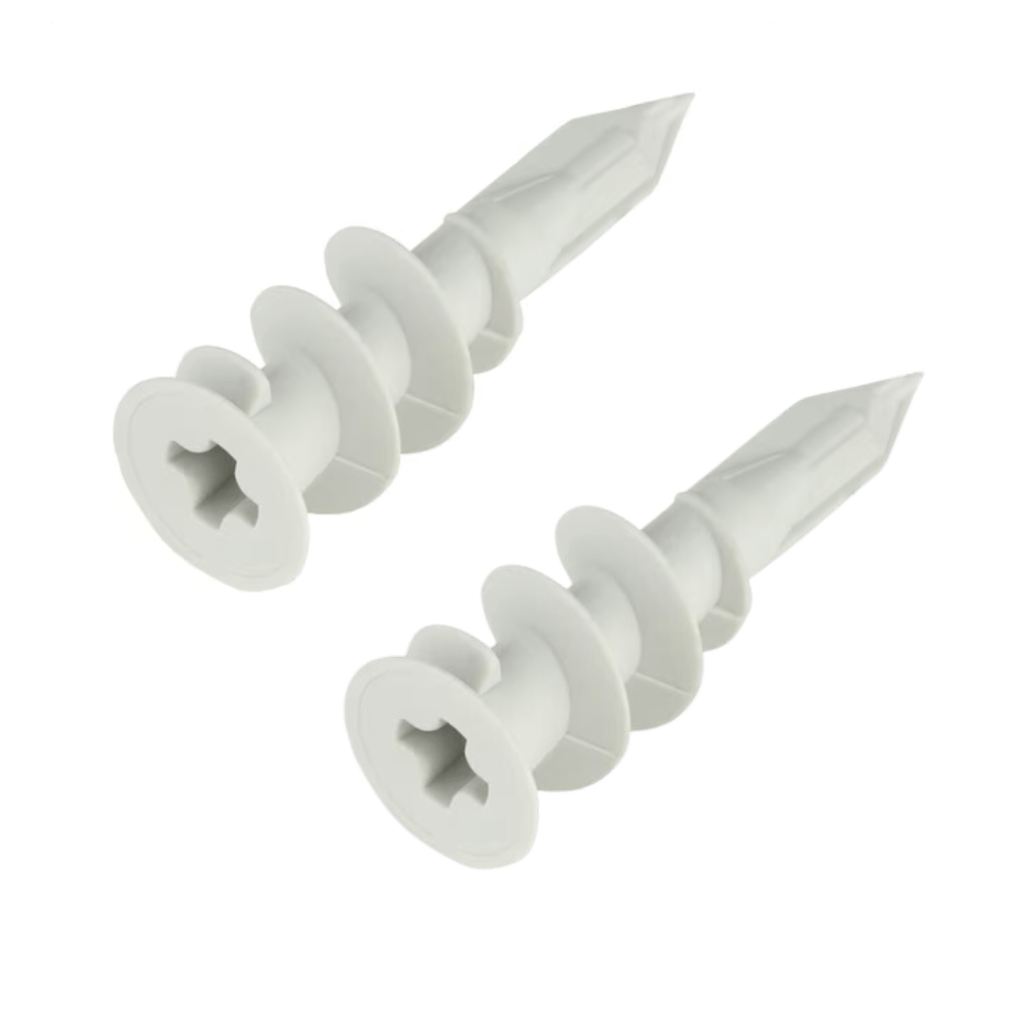
- Examine the drywall anchor to ensure it doesn’t have a Phillips head tip.
- Using a screwdriver or a similar flat tool, gently push the anchor through the drywall. Apply steady pressure until it’s flush with the wall’s surface.
- Once the anchor is pushed in, you’ll have a small hole left in your wall. Use a putty knife to apply a layer of drywall patching compound over the hole.
- Allow the compound to dry according to the manufacturer’s instructions. Typically, it will take a few hours or overnight.
- After the compound is dry, use sandpaper to smooth out the patched area until it’s flush with the surrounding wall.
- Finish by painting over the patched area with paint that matches your wall color, and you’re done!
Method 2: Needle Nose Pliers
This method requires a bit more finesse, I always think of it as playing the game Operation. You’ll use needle nose pliers to grip and twist out the plastic drywall anchor.

Materials Needed:
- Needle nose pliers
- Drywall patching compound
- Putty knife
- Sandpaper
- Paint (matching your wall color)
Step-by-Step Guide:
- Examine the drywall anchor to ensure it doesn’t have a Phillips head tip.
- Insert the needle nose pliers into the anchor’s hole, gripping it firmly.
- Gently twist the pliers counterclockwise while pulling outward. This should gradually release the anchor from the wall.
- Once the anchor is removed, you may have a small hole in your wall. Follow the same steps as in Method 1 to patch and finish the wall.
Method 3: Unscrew with Phillips Head
If your plastic drywall anchor has a Phillips head tip, consider yourself lucky, as this is the simplest removal method.
Materials Needed:
- Phillips screwdriver
- Drywall patching compound
- Putty knife
- Sandpaper
- Paint (matching your wall color)
Step-by-Step Guide:
- Confirm that your drywall anchor has a Phillips head (+) tip.
- Insert a Phillips screwdriver into the anchor’s head.
- Turn the screwdriver counterclockwise to unscrew the anchor from the wall. This should be a straightforward process.
- After removing the anchor, follow the same steps as in Method 1 to patch and finish the wall.
Conclusion
Removing plastic drywall anchors without a Phillips head doesn’t have to be a daunting task. Whether you choose the push and patch method, the finesse of needle nose pliers, or the simplicity of a Phillips head, you can confidently tackle this DIY project. Remember to follow the steps for patching and finishing to leave your wall looking clean and pristine. Now that you know these techniques, you can confidently handle plastic drywall anchors in your home with ease.