How To Properly Skim Coat Over Wallpaper: My Experience
Reviving your walls by skim coating over wallpaper doesn’t have to be a complex task. As someone experienced in drywall work, I’m here to simplify the process for you. In this detailed guide, we’ll take a deep dive into every step, providing straightforward tips to help you achieve that smooth, fresh look. By the end of this article, you’ll not only have beautifully prepared walls but also the confidence to tackle similar projects.
1. Assess and Prepare Your Wallpapered Walls
Start by examining your wallpapered walls. Look for loose areas and bubbles. Use a sheetrock knife to cut out any problem areas. Remember, preparation is key.

If you notice any wallpaper that is loose, sticking out, or bubbling, this should be addressed before proceeding. If the wallpaper is not securely adhered to the wall, it will cause problems when applying the skim coat. The moisture of joint compound will cause bubbles to become larger.
2. Choosing the Right Primer and Sealer
Selecting the appropriate primer and sealer is essential to the success covering wallpaper. An oil-based primer and sealer work best for this task, but due to recent regulations, oil based primers may not be available in gallons; but quarts only. Oil based primers are heavily regulated due to their VOC content. Until companies figure out a way to minimize the VOC on some of these compounds, you will have to use a water-based formula.
KILZ is my go-to brand, and I have always used their priming products. Here is my recommendation:
3. Applying Primer and Sealer: A Must-Do Step
Once you have your primer and sealer ready, it’s time to apply them to your walls. The primer and sealer application is a crucial step because it creates a sealed surface that protects your skim coat from potential issues related to the wallpaper.
Use a paintbrush or a roller to apply the primer and sealer evenly across the wallpapered surface. Make sure to cover every inch thoroughly. Allow the primer and sealer to dry completely before moving on to the next step.
4. Let’s Get Started with Skim Coating
With your wallpapered walls now properly primed and sealed, it’s time to dive into the world of skim coating. Skim coating involves applying a thin layer of joint compound to create a smooth and uniform surface. This technique is particularly effective for concealing wallpaper textures and imperfections.
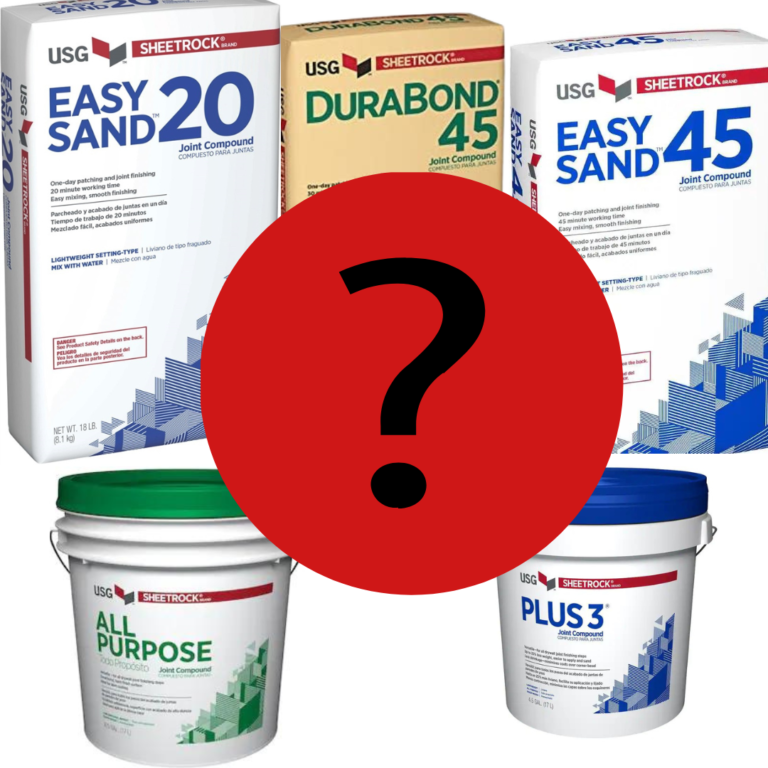
For the first skim coat, you’ll use thinned all-purpose joint compound. Taking it one step at a time is essential to ensure a smooth finish. Here’s how to proceed:
- Begin by mixing the joint compound with a little bit of water (2 cups water per 5 gallons joint compound) until it reaches a creamy consistency. The goal is to achieve a texture similar to pancake batter.
- For faster application, use a paint roller to apply the thinned joint compound to the walls. If not, a skimming blade or 12″ taping knife is recommended. It’s important to work on one area at a time to ensure that you can smooth out the compound before it starts to dry.
- Pay close attention to achieving an even and consistent layer of joint compound. This is crucial for a successful skim coat.
5. The First Skim Coat: Easy Techniques
Achieving a smooth and even skim coat requires attention to detail and the use of effective techniques. Here are some tips for a successful first skim coat:
- Maintain a consistent thickness: Keep an eye on the thickness of the joint compound as you apply it. You want to avoid creating uneven patches.
- Work systematically: Start in one corner of the room and work your way across the wall in manageable sections. This approach ensures that you can smooth out the compound before it dries.
- Check for bubbles and imperfections: While the compound is still wet, inspect the surface for any bubbles or imperfections. Use a taping knife or a putty knife to gently remove these flaws and create a smoother finish.
- Feather the edges: To blend the edges of the skim coat with the surrounding wall, feather the edges by applying less pressure on the outer edges of your trowel or knife as you smooth the compound.
6. Speed Things Up with a Paint Roller
An efficient way to apply the first skim coat is by using a paint roller. This method not only speeds up the process but also helps maintain a consistent layer of joint compound.
Here’s how to use a paint roller for skim coating:
- Select a paint roller with a smooth nap cover. A smooth nap cover helps ensure a more even application of the joint compound.
- Dip the roller into the (thinned) joint compound bucket.
- Start rolling the compound onto the wall, working in small sections at a time.
- Use long, even strokes to create a smooth and consistent layer.
- Be vigilant for any bubbles or imperfections and address them promptly.
Using a paint roller not only makes the application process faster but also provides a more uniform finish. It’s especially helpful when working on larger wall surfaces.
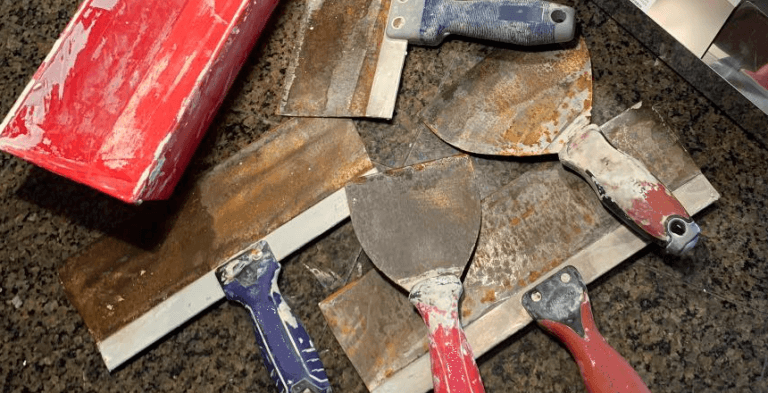
7. The Best Tools for Skim Coating
While a 12-inch taping knife can be used for skim coating, there are more efficient tools available, such as large skimming blades. Tools like those from LEVEL5 Tools offer a range of blade sizes, from 24 inches to 48 inches. These wide blades can significantly expedite the skim coating process and provide superior results.
Here’s why using a large skimming blade is advantageous:
- Faster coverage: Large skimming blades cover a larger area with each pass, reducing the number of strokes required to achieve a smooth surface.
- Improved control: The wide blade provides better control over the joint compound, resulting in a more even application.
- Fewer imperfections: Large skimming blades are excellent at minimizing imperfections and creating a seamless finish.
When choosing a skimming blade, consider the size of your walls and ceilings. A wider blade is ideal for larger surfaces, while a smaller one may be suitable for smaller areas or detail work.
8. Sanding: Getting Ready for Round Two
After the first skim coat has dried, it’s time to prepare the surface for the second coat. This involves light sanding or scraping to eliminate any imperfections and create a smooth canvas for the next layer of joint compound.
Here’s how to prepare the surface for the second skim coat:
- Begin by inspecting the wall for any bumps, ridges, or rough areas. Pay close attention to the seams and corners, as these areas may require extra attention.
- Use a sanding block or sandpaper with a grit of around 150+ to lightly sand the surface. Sanding helps smooth out any uneven spots and creates a uniform texture across the wall.
- Be gentle while sanding to avoid damaging the first skim coat. The goal is to create a surface that is free of imperfections but still retains the first coat’s integrity.
- After sanding, wipe down the wall with a damp cloth to remove any dust or debris. This ensures that the surface is clean and ready for the second skim coat.
9. Achieving Perfection with Lightweight Compound
For the second skim coat, it’s a good idea to use a lightweight joint compound, such as Plus3 joint compound. Lightweight compounds are easier to work with and provide a smoother finish, making the final sanding process much more manageable.
Here are some key benefits of using lightweight joint compound:
- Easy application: Lightweight compound is less dense, making it easier to spread and work with.
- Reduced shrinkage: Lightweight compounds tend to shrink less as they dry, which helps maintain a smooth surface.
- Improved sanding: Because lightweight compounds are less dense, they sand more easily and create a smoother finish.
When applying the second skim coat with lightweight compound, follow the same techniques and procedures as you did for the first coat. Ensure even coverage and a consistent thickness to achieve the best results.
10. Final Sanding: The Polishing Touch
Once the second skim coat has dried, it’s time for final sanding. This step is crucial for achieving a professional-quality finish and ensuring that your walls are perfectly smooth.
Follow these steps for final sanding:
- Begin by inspecting the surface for any remaining imperfections or rough areas. Look closely at seams, corners, and edges. TIP: Use an LED light at an angle to reveal imperfections.
- Use a sanding block or a drywall sander with a grit of around 150 to gently sand the entire surface. Work in even strokes, and focus on creating a smooth and uniform texture.
- Be meticulous during this step, as the quality of your final finish depends on the thoroughness of your sanding.
- After sanding, wipe down the walls with a damp cloth to remove any dust or residue. This ensures that the surface is clean and ready for the final steps.
- If you notice any remaining imperfections or uneven areas after sanding, you may need to apply a thin layer of joint compound to those spots and repeat the sanding process.
- Keep in mind that the goal is to achieve a surface that is completely smooth and free of visible imperfections.
11. Applying the Final Primer Coat
To ensure superior paint adhesion and create a secure surface for your final finish, apply another coat of the same oil-based primer and sealer that you used at the beginning of the project. This final coat of primer serves as an excellent base for your paint and provides an additional layer of protection for your walls.
Here’s how to apply the final primer coat:
- Once the walls have been sanded and cleaned, use a paintbrush or roller to evenly apply the oil-based primer and sealer.
- Ensure thorough coverage, and pay attention to any areas that may require extra attention, such as corners and edges.
- Allow the final primer coat to dry completely before proceeding to the next step.
- The final primer coat not only enhances paint adhesion but also seals the surface securely, preventing any potential issues related to the wallpaper.
12. Time for Painting
With your walls expertly skim coated, primed, and sealed, they are now ready for painting. This is where you can let your creativity shine by selecting the perfect paint color and finish to suit your space.
Here are some tips for a successful painting process:
- Choose a high-quality paint that suits your desired look and budget. Consider factors like the room’s lighting, color scheme, and your personal preferences.
- Prepare your painting tools, including brushes, rollers, paint trays, drop cloths, and painter’s tape.
- Begin by cutting in along the edges and corners of the walls with a paintbrush. This creates a clean, precise line where the roller may not reach.
- Use a paint roller with a smooth nap cover to apply the paint to the main wall surfaces. Roll the paint on evenly, working in manageable sections.
- Be mindful of maintaining a wet edge while painting to prevent visible brush or roller marks.
- Allow each coat of paint to dry completely before applying additional coats. Follow the manufacturer’s recommendations for drying times between coats.
- If necessary, apply a second or even a third coat of paint to achieve the desired depth of color and finish.
- Once the paint is dry, remove any painter’s tape and clean up any drips or splatters.
- Step back and admire your beautifully transformed walls!
13. Troubleshooting and Expert Tips
Even with careful planning and execution, you may encounter challenges during the skim coating process. Here are some common issues and expert tips for troubleshooting:
- Bubbles or imperfections: If you notice bubbles or imperfections in the skim coat, address them promptly while the compound is still wet. Use a sheetrock knife/utility knife to cut out any bubbles, prime, and apply compound.
- Uneven thickness: Achieving a consistent thickness in your skim coat is essential. If you notice areas that are thicker or thinner than the rest, use your taping knife or a skimming blade to adjust and feather the edges for a seamless look.
- Sanding difficulties: If you encounter difficulties while sanding, such as clogging sandpaper or excessive dust, consider using a sanding sponge or a dustless drywall sander for a more efficient and cleaner sanding process.
- Maintaining consistency: Consistency in your skim coat application is key. Pay attention to the pressure and angle of your taping knife or skimming blade to ensure even coverage and minimize variations in texture.
- Practice makes perfect: Skim coating can be a skill that improves with practice. If you’re new to the technique, consider practicing on a small, inconspicuous area before tackling larger walls.
14. Maintaining Your Newly Skim Coated Walls
After all the hard work you’ve put into skim coating and painting your walls, it’s important to maintain their pristine appearance. Proper maintenance ensures that your freshly transformed walls continue to look great for years to come. Here are some tips for maintaining your newly skim coated walls:
- Regular cleaning: Dust and dirt can accumulate on your walls over time. To keep them looking their best, dust the walls regularly with a soft, dry cloth or a dusting brush. Consider using a high-sheen paint for easier cleanup!
- Avoid harsh cleaning products: When it’s time to clean your walls, use a mild, pH-balanced cleaner and a soft sponge or cloth. Avoid abrasive cleaners or scrub brushes that can damage the paint or skim coat.
- Address stains promptly: If you notice any stains or marks on your walls, address them as soon as possible. Blot stains gently with a clean cloth and a mild cleaning solution appropriate for the type of paint you used.
- Touch up as needed: Over time, minor scuffs or scratches may occur on your walls. Keep a small amount of leftover paint on hand to touch up these areas as needed.
- Inspect for damage: Periodically inspect your walls for any signs of damage, such as cracks or peeling paint. Address any issues promptly to prevent them from worsening.
- Protect high-traffic areas: In areas that receive a lot of traffic, such as hallways or entryways, consider using protective wall coverings or installing chair rails to minimize wear and tear.
- Maintain proper humidity: Extreme fluctuations in humidity can affect your walls. Using a humidifier in dry conditions or a dehumidifier in humid conditions can help maintain the integrity of your walls.
By following these maintenance tips, you can keep your skim coated walls looking beautiful and protect your investment in your home’s interior.
15. Get Inspired for Your Transformed Space
Now that your walls are freshly skim coated, primed, and painted, it’s time to get inspired for your transformed space. The possibilities are endless when it comes to decorating and styling your room. Whether you’re planning a complete interior makeover or simply refreshing the decor, your beautifully prepared walls provide the perfect backdrop for your design aspirations.
Here are some ideas to spark your creativity:
- Choose complementary colors: Select furniture, accessories, and decor that complement the color of your newly painted walls. Consider creating a cohesive color scheme that ties the room together.
- Add texture: Incorporate texture through textiles such as rugs, curtains, and throw pillows. Textured wallpaper or wainscoting can also enhance the visual interest of your space.
- Create a focal point: Highlight a specific area or feature in your room, such as a fireplace, by arranging furniture and decor to draw attention to it.
- Personalize with art: Display artwork, photographs, or wall sculptures that reflect your personal style and interests. Art can serve as a conversation starter and add character to your space.
- Introduce greenery: Incorporate indoor plants or succulents to bring a touch of nature into your home. Plants not only enhance the aesthetics but also contribute to a healthier indoor environment.
- Experiment with lighting: Explore different lighting options, such as pendant lights, table lamps, or wall sconces, to create ambiance and illuminate key areas of your room.
- Maximize storage: If your space is limited, consider furniture with built-in storage solutions to keep your room organized and clutter-free.
- Accessorize with rugs: Area rugs can define spaces, add warmth, and introduce color and pattern to your room. Choose a rug that complements your decor style.
- Layer textiles: Layering textiles, such as blankets, cushions, and curtains, can create a cozy and inviting atmosphere in your room.
- Stay true to your style: Ultimately, the most important aspect of decorating your transformed space is staying true to your personal style and preferences. Choose decor and furnishings that make you feel comfortable and reflect your personality.
Conclusion
Congratulations! You’ve completed the journey of skim coating over wallpaper, transforming your walls into a smooth and fresh canvas. This comprehensive guide has provided you with the knowledge and confidence to tackle this project with success. From assessing and preparing your wallpapered walls to selecting the right materials, applying the skim coats, and adding the final touches with paint and decor, you’ve mastered the art of wall transformation.
Remember, skim coating over wallpaper may seem like a challenging task, but with patience and dedication, you can achieve professional-quality results. Whether you’re renovating a room, preparing a space for a new look, or simply seeking to refresh your home’s interior, the skills and techniques you’ve acquired in this guide will serve you well.
Embrace the challenge, unleash your creativity, and enjoy the satisfaction of a job well done. Your newly transformed space awaits, ready to inspire and delight you for years to come. Happy renovating!